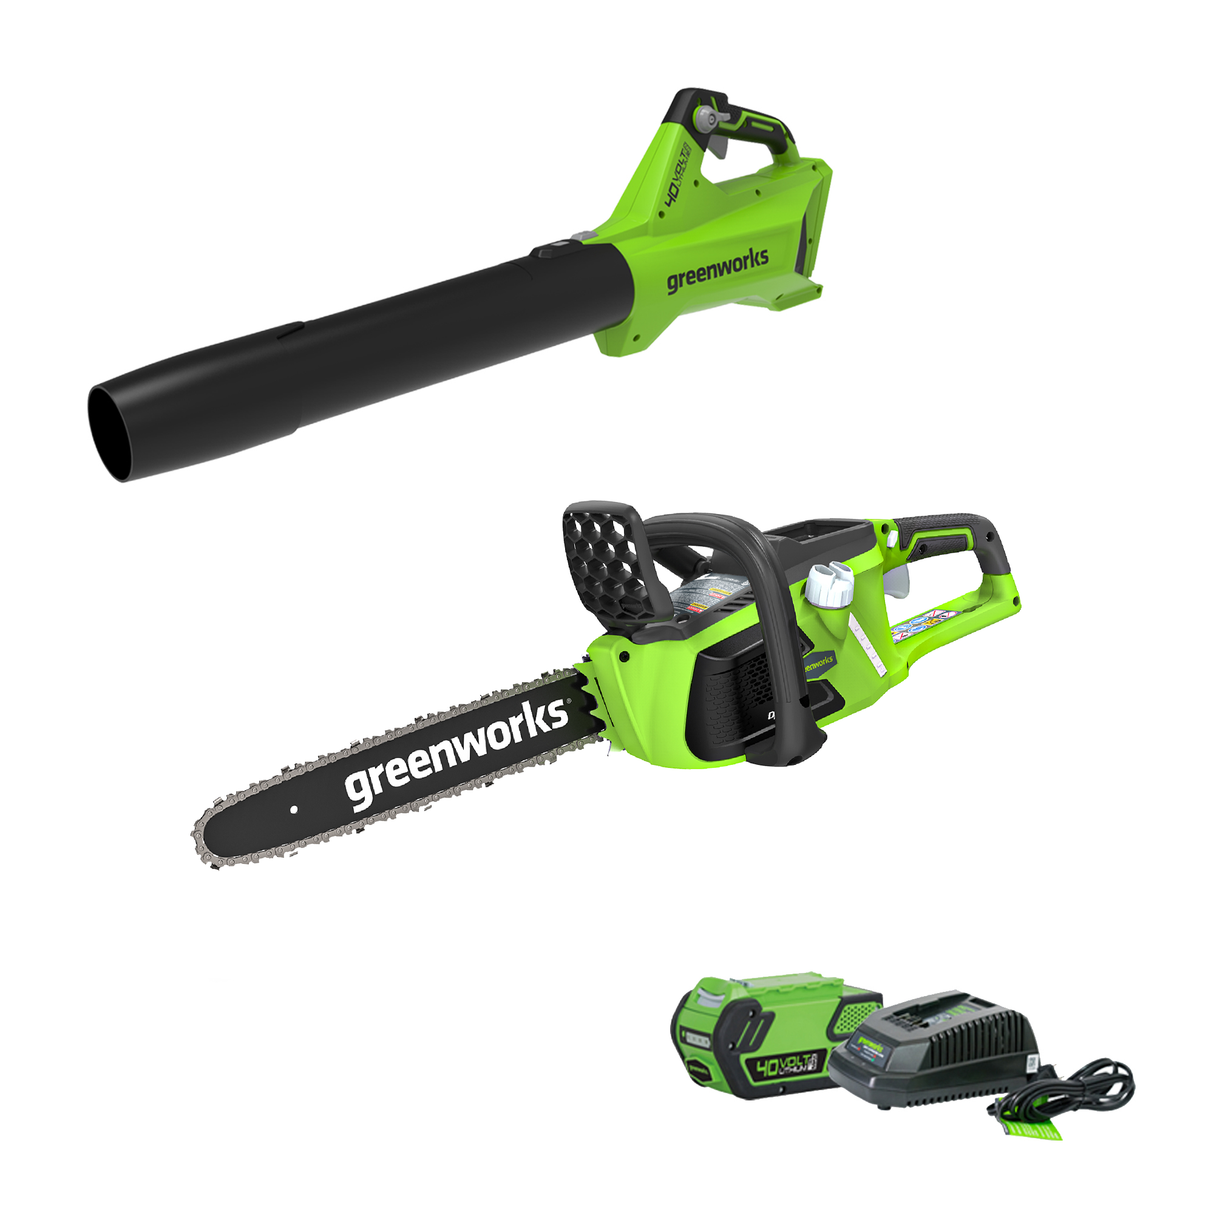
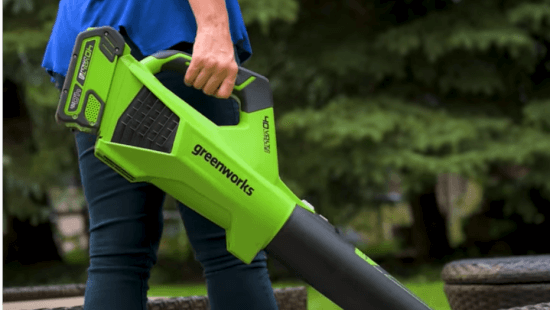
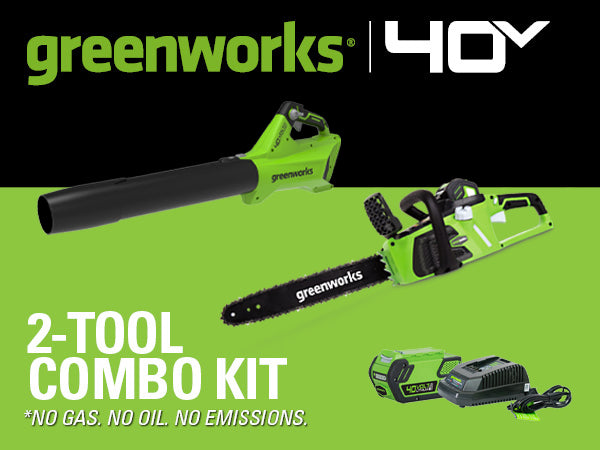
40V 14" Chainsaw & 40V 125 MPH - 450 CFM Axial Jet Blower Combo, 4.0Ah Battery and Charger Included
Key Features
Key Features
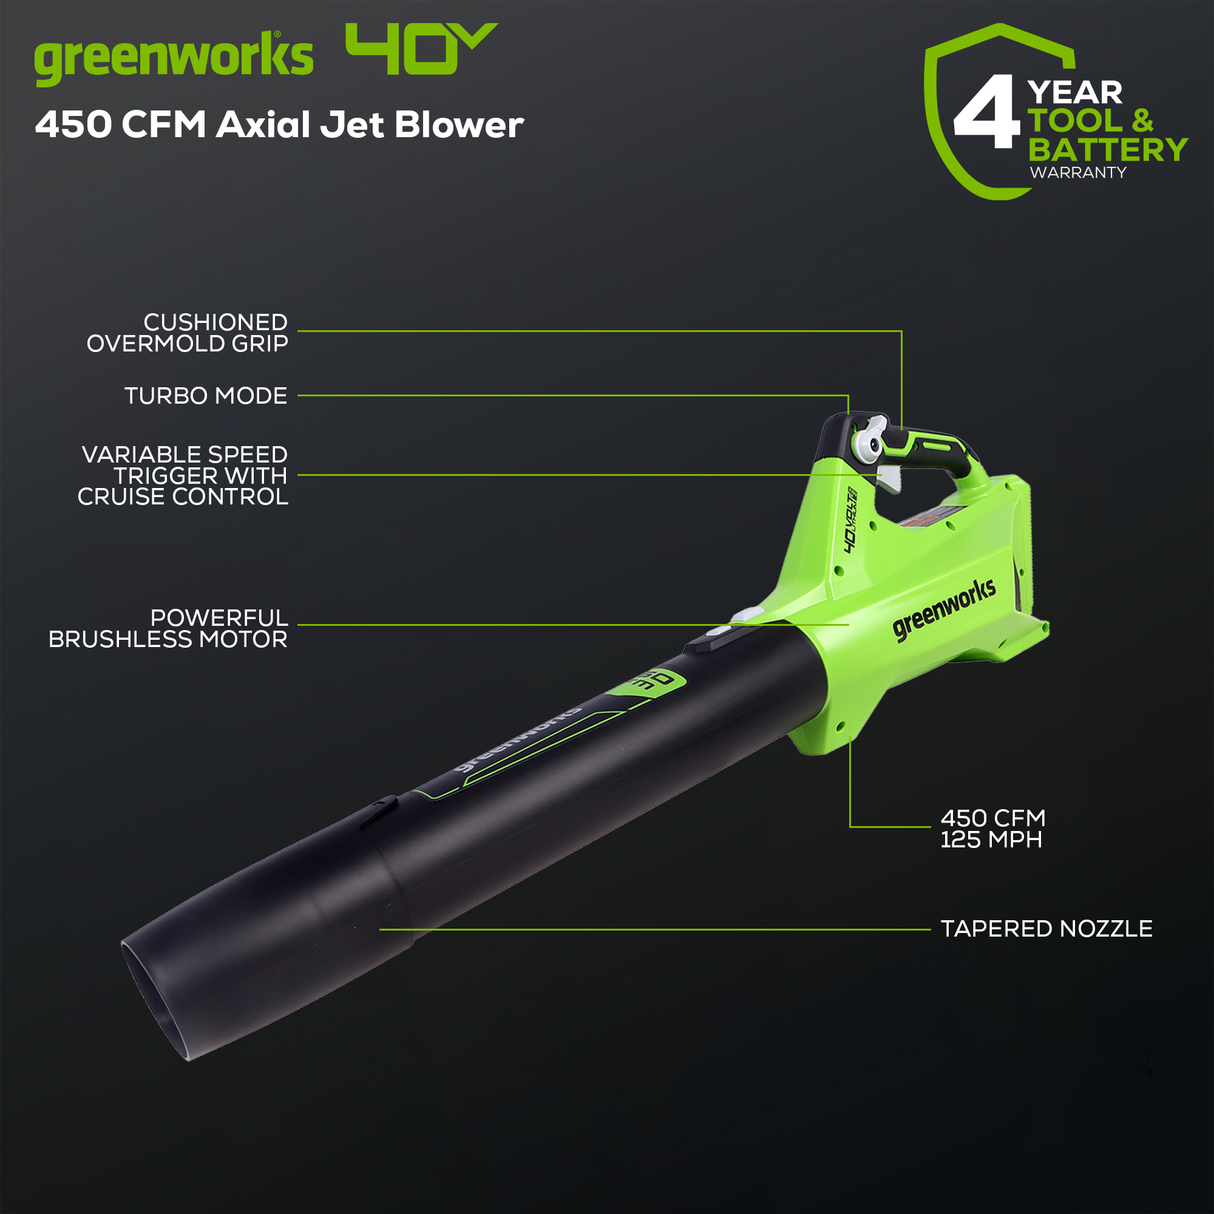
- ✓Brushless Technology
- ✓Variable Speed Trigger
- ✓Precise Cruise Control
- ✓Turbo Button
- ✓Automatic Oiler - Ensures durability and extends the life of the chain.
- ✓Translucent Oil Tank
- ✓Lightweight
Warranty
Warranty

Compatible With :
Description
Description
Cordless outdoor tools are ideal for homeowners like you who are simplifying and focusing on what’s essential to getting the most out of life. The Greenworks 40V family of tools are built with medium weight construction and high-efficiency motors. The Greenworks 40V lithium-ion platform powers over 40 outdoor products, including lawn mowers, blowers, string trimmers, chainsaws, hedge trimmers, and much more! The 40V lithium-ion battery provides the power you need, and delivers fade-free power with no memory loss after charging. The Greenworks 40V platform comes with a 3 year tool / battery warranty to protect your investment. Of high-quality manufacturing, these products are easy to start and lighter weight than the gas products you’re used to, making your day of yard work a whole lot easier. Perfect for yards up to ⅓ acre, Greenworks 40V tools are lightweight, start instantly, and require virtually no maintenance – no gas, no oil, no mess – but still deliver gas-like power.
Specifications
Specifications
-
40V 4.0Ah Lithium-ion Battery
-
Voltage40V
-
Amp Hours4Ah
-
Weight3.02 lbs.
-
Size3.7" × 4" × 7.1"
-
Watt Hours144
-
Charge Time to 100%from 120 mins
-
Life CyclesUp to 2000
-
Warranty3-Year Warranty
-
40V Charger
-
Voltage40V
-
Weight2 lbs.
-
Size6.5" × 8.3" × 3.7"
-
Charge Time to 100%from 120 mins
-
Charge Time (2.0 AH Battery)from 60 mins
-
Charge Time (4.0 AH Battery)from 120 mins
-
Warranty3-Year Warranty
-
40V 120 MPH - 450 CFM Jet Blower (Tool Only)
-
Voltage40V
-
Weight4.4 lbs.
-
Assembled Product Dimensions36.4" × 7.2" × 10.5"
-
Package Dimensions18.7" × 7.6" × 10.8"
-
Package Weight6.6 lbs. (3 kg)
-
BatteriesNot Included / Sold Separately
-
MotorBrushless
-
Rated Power of Motor0.58 kW
-
Fan DesignAxial
-
Maximum Air Speed (MPH)120 MPH
-
Maximum Air Volume (CFM)450 CFM
-
Variable Speed Trigger?Yes
-
Turbo ButtonYes
-
Cruise ControlYes
-
Cushioned GripYes
-
Noise Level @ 50' (Long Range)67 dB
-
Estimated Assembly Time≈15 minutes
-
Warranty3-Year Warranty
-
40V 14" Chainsaw, 4.0Ah Battery and Charger
-
Voltage40V
-
Weight10.7 lbs.
-
Assembled Product Dimensions29.7" x 9.5" x 8.7"
-
Package Dimensions30.4" x 9.5" x 9.6"
-
Package Weight16.7 lbs. (7.6 kg)
-
Battery Ampere-Hours4.0 Ah
-
Battery IndicatorPower Display on Battery
-
Cuts per Charge (4x4 Lumber)Up to 150 Cuts
-
Charger IncludedStandard 2A Charger
-
Charge Time for 4.0 Ah BatteryUp to 120 Minutes
-
MotorBrushless
-
Rated Power of Motor1.3 kW
-
Active Chain Brake?Yes
-
Bar/Chain Length14"
-
Chain Size3/8" Low Profile Pitch, .043" Gauge, 52 Drive Links
-
Tenison System?Tool-less
-
Chain OilerYes
-
Oil TypeStandard Bar and Chain Oil
-
Oil Tank Capacity200 ml
-
Estimated Assembly Time≈5 minutes
-
Warranty3-Year Warranty
Manuals
Manuals
Product Videos
Frequently Asked Questions
Frequently Asked Questions
- What oil do I use with my chainsaw?
- Why is my chainsaw leaking oil?
- How large of a branch/log can I cut?
- What is the run time?
- How do I know if my chain is tensioned enough?
- Can I use another brand of chain?
- What file size do I use to sharpen the chain?
- Why isn’t my chain cutting?
- Why does my chain keep falling off?
- Do you make Gas Blowers?
- Is a battery powered leaf blower quieter than gas?
- What is more important MPH or CFM?
- What is the most appropriate blower for my property?
- Can I use my blower to dry my car or blow snow off my driveway?
- What is the difference between a hand blower and backpack blower?
- How do I use the mulch function with my blower/vacuum?
- Why is dust coming out of my collection bag while using my Blower?
- Why is my vacuum not collecting garden debris?
- What blower can I use for Hard surfaces?
- What is the battery life and how do I maximize it?
- How should I store and care for my Greenworks battery to ensure the best performance and longest lifespan?
- Can I leave my battery in the charger after charging it?
- Why do batteries cost so much more than the tool?
- How do I store the battery? Can I leave the battery in the garage or shed?
- My battery is stuck in my tool. How do I get it out?
- How do I check the charge on my battery?
- Can I use any Greenworks battery in any Greenworks tool?
- Are there certain tools that can’t accept all same voltage batteries?
- Do all batteries of the same voltage use the same charger?
- The charger indicates that my battery is fully charged but I was just using it and it depleted. Why isn’t it charging?
- My charger is flashing red when I engage my battery. Why is this happening?
- My charger has a solid red light on it when I engage my battery. What is happening?
- Are your chargers made for 220V or 120V outlets?
Our units use a standard bar and chain oil. You can purchase this from your local hardware store; no specific brand name is required
All chainsaws will slowly “leak” oil in storage (mostly from it seeping off the chain). To prevent excessive leakage, store with as little oil left in the reservoir as possible, lay the chainsaw flat with a rag beneath it and the pole saw upright with the motor head at the top. During first use, operators should only fill the reservoir to roughly half full and check periodically to see if it needs to be refilled. Eventually, you will become accustomed to the amount of oil required for each job. This procedure will make it easier to store the unit as oil free as possible and reduce oil run off.
If you are looking to cut logs with one pass, the log needs to be about 2" smaller than the bar. However, there are many techniques to use a chainsaw for larger cuts.
The run time of a chainsaw is measured in cuts per charge. The number of cuts per charge or “run time” that you receive would depend on the load acting on the saw (i.e., the thickness and type of wood being cut) as the chainsaw would use more battery power on tougher and thick objects being cut.
Chains should be tensioned before use. Check intermittently throughout each chore to make sure the chain is kept properly tensioned. A correctly tensioned chain should only pull away from the bar enough to fit a dime between the teeth and the bar. ***DO NOT TENSION A CHAIN AFTER YOU HAVE FINSHED USING THE TOOL. HOT METAL EXPANDS. IF THE CHAIN NEEDS TENSIONED WHEN HOT, THEN ALLOW TO COOL, THE CONTRACTING METAL COULD POTENTIALLY DAMAGE THE CHAIN, THE BAR AND EVEN THE UNIT. WAIT UNTIL THE NEXT USE (OR AT LEAST UNTIL COOLED) BEFORE TENSIONING***
Yes, however, it must match the specifications of the original chain (gauge, pitch, and drive links). These specifications my be found inside of your owner’s manual.
Our chains may be sharpened using a 5/32” round file.
If the wood is burning/smoking, this indicates that the chain is on backwards. Another reason could be that the chain is dull and needs to be sharpened or replaced. Replace the chain if: • The length of the cutting edges is less than 5 mm. • There is too much space between the drive links and the rivets. • The cut speed is slow • Sharpening the chain many times but it does not increase the cutting speed.
Chainsaw chains can come off due to multiple reasons such as worn-down bars, worn-down sprockets, and wrongly set chain tension. Please check the chain tension and condition of all parts prior to using. If anything is worn or damaged, replace parts before using again. Replace the bar if: • the groove is not fit with the height of the drive links (which must never touch the bottom). • the inside of the guide bar is worn and make the chain lean to one side.
All Greenworks leaf blowers are cordless, battery-powered blowers or corded. Greenworks does not make gas-powered models.
Electric and battery-powered leaf blowers – in general, are quieter than gas models. DB rating does depend on the model. Depending on the yard you intend to work on, the airflow coming from the device can be a primary factor as well.
Both CFM and MPH have their benefits. It would depend on which type of blower you’re looking for. MPH is an abbreviation of miles per hour. This denotes the speed at which the air exits the blower. Higher MPH figures produce large pressure changes at the blower inlet. Therefore, a higher MPH is beneficial when looking at blower/vac units. MPH is usually the more important stat here as a higher airspeed helps move heavier debris. CFM is an abbreviation of cubic feet per minute. This denotes the volume of air displaced by the blower. High CFM units tend to move large air volumes at relatively low speeds allowing large areas to be swept and cleared in a controlled, shorter time. Therefore, axial blowers/dedicated blowers benefit more from a higher CFM and is more desirable for these units
Generally, electric leaf blowers have a CFM falling somewhere from just under 200 to 400. If your property is an acre or more, you will probably want a leaf blower with a CFM between 400 to 700
We do not recommend using this blower for any task other than leaf blowing.
Hand-held blowers are often less expensive than backpack blowers. They have smaller motors to ensure they're not too heavy to carry. Since the motor is smaller, they have less power. These blowers are great if you have a small yard, but can be taxing if you’re spending 30-40 minutes on the job. Backpack blowers provide more power, and you can carry them wherever you go. They have the added benefit of being more ergonomic since you are not relying solely on arm strength. Backpack blowers are better for tackling large jobs, but they’re also more expensive than the hand-held blower
When mulching leaves the Blower/Vac must be in TURBO-MULCH mode. Items such as small leaves and twigs will be mulched as they pass through the fan housing. We recommend emptying the bag after each use to avoid deterioration and obstructing air flow, which will reduce the performance of the mulcher.
There are tiny holes in the collection bag that are necessary for the operation of the Greenworks collection bag. These will allow very small particles of dust to pass through.
If your blower is not easily picking up the leaves, ensure that the nozzle is close enough to the leaves. Also make sure that the mode indicator is on the correct setting. Press the low/high switch to increase the speed options. The unique design of the blower-vac means that only light weight, low density objects such as leaves, and garden debris will be collected. It’s worth noting, higher density objects such as stones and sticks will not be collected. If you are finding the unit is still not picking up it may be necessary to remove the blower tube or mulcher tubes to clear a blocked tube or impeller. Please be sure to remove the battery or unplug the unit before checking the tube or impeller.
The best push power for removing heavy or wet organic materials from soft surfaces like grass, dirt or sand will come from a corded electric blower or from our 80V PRO blowers. The 80V 580 CFM Brushless Backpack Blower, with up to 580 CFM at 145 or the 80V 500 CFM Cordless Brushless Axial Blower with up to 500 CFM of air flow both units offer more CFM
To get the most life out of your battery, you should remove it from the charger once it has finished charging. The problem with overcharging is the potential damage to the battery which can shorten its lifespan and leave you in a lurch if it quits in the middle of a project.
We want you to get the most out of your tools, and that starts with understanding how to care for your battery. Proper storage and handling not only extend battery life but also ensure your tools are ready to perform when you need them most. A Quick Note on Lithium-Ion Battery Performance All Greenworks batteries use lithium-ion technology, which offers powerful, consistent performance without the memory effect found in older battery types. However, lithium-ion batteries are sensitive to temperature extremes—both heat and cold can affect performance and longevity. That’s why proper storage and care are essential for keeping your battery in peak condition. Best Practices for Battery Storage and Use: Store batteries indoors in a cool, dry location—away from direct sunlight, humidity, or extreme temperatures. This protects internal components and preserves performance. Only connect the battery to the charger when actively charging. When not in use, unplug the charger and keep the battery disconnected. If storing for an extended period, charge the battery fully before putting it away. Check the charge every couple of months. If it drops, recharge it before returning it to storage. This helps maintain battery health over time. Allow the battery to reach a safe operating temperature before use. For snow throwers and cold-weather operation, cold batteries may not power on. Let the battery warm to room temperature indoors before inserting it into the tool. Kindly note: Once the battery is at room temperature and installed, the current generated while the tool is running will help keep the battery warm. As long as the battery starts at room temperature, you should not experience issues even when working in cold outdoor conditions. For other tools/hot weather operation, if the battery has become hot from use or charging, allow it to cool before reinstalling. Indoor storage helps avoid performance issues related to both hot and cold environments and keeps your battery protected year-round.
The battery chargers do have auto cut offs to prevent it from over charging. However, we do advise customers to remove the battery from the charger after it has been fully charged and to also unplug the charger from the outlet, as this is good electrical safety practice to do so. This will also help to prevent false defect readings and allows the charger to reset itself each time it’s used to charge a battery.
The battery is the most important component for a battery-operated unit. Please be assured we price our batteries with the cost of material, manufacturing, and current market pricing in mind. Batteries are the costliest items to manufacture and ship in any kit. Full kits including a tool, battery, and charger are priced affordably so that consumers can begin building that line of tools and move forward purchasing tool-only units. When you purchase batteries on their own, it is more notable the cost that they carry.
When the battery is not in use, we suggest storing it indoors, in a cool dry area - away from direct sunlight. Leave the charger unplugged and the battery disconnected from the charger unless it needs charging. It is recommended to store the battery with a full charge, and if it is being stored for a period where no use is expected, to check on the charge every couple of months. If you notice the charge has dropped, we advise charging the battery back up to full before returning it to its safe storage place. Following these steps will ensure you receive the most out of the battery life.
60V/ 80V Products: To remove the battery, push and hold the battery release button. Then, pull the battery pack straight out. In some cases, if the springs underneath have gotten locked down you might have to give a small push to the top of the battery to re-engage them to help the battery pop up. The battery pack fits snugly into the product to prevent accidental dislodging while in use; it may require a strong pull to remove. Before use, be sure that the rails on the battery and product are free of debris that could cause the battery to get stuck. 24V/ 40V Products: To remove the battery, press the latch button on the battery pack down and hold. Pull the battery pack out of the handle. The battery pack fits snugly into the product to prevent accidental dislodging while in use; it may require a strong pull to remove. Before use, be sure that the rails on the battery and product are free of debris that could cause the battery to get stuck.
Press the battery capacity indicator (BCI) button located at the end of the battery. The lights will illuminate according to the battery capacity level. Please note this switch does require a firm direct push using the tip of your finger. If the button is not being fully engaged, the lights will not activate. Please also be advised the lights only stay on for a few seconds and will automatically turn off. Another reason the lights will not power on is if the battery is completely depleted of power and needs to be charged.
Our batteries are interchangeable with tools that are of the same voltage platform only. The difference between batteries of the same voltage is the ampere-hour (Ah) rating. The higher the ampere-hour (Ah) rating on the battery is the more run time it has to offer.
There are a few exceptions. • Our 80V 20” snow thrower models 2600402 / 2605202 / 2601302 manufactured prior to September of 2017 can only use 2.0Ah or 2.5Ah battery models. • Our 60V 8.0Ah battery model 2957102 cannot be used in the following tools due to the height: dual-port lawnmowers, pressure washers, or the wet/dry vacuum.
Yes, they do. Each product line has designated charger models that can charge all batteries in that voltage platform, no matter the Ah rating.
Putting a battery that was just in use onto the charger often results in a false full charge signal. Remove the battery from the charger and allow it to rest in a room temperature area for approximately 10-15 minutes before charging.
When the battery is inserted into the charger and the status LED blinks red, remove the battery from the charger for 1 minute, then reinsert. If the status LED blinks green, then the battery is properly charging. If the status LED is still blinking red, remove the battery and unplug the charger for 1 minute. After 1 minute, plug in the charger and reinsert the battery. If the status LED blinks green, then the battery is properly charging. If the status LED is still blinking red, then this likely indicates an issue with the battery or charger and should be taken care of either with our warranty team or by means of replacement.
This typically indicates that the battery is at the wrong temperature to be charged. Allow the battery and charger to rest indoors at room temperature until they are no longer hot/cold and attempt charging again.
Greenworks chargers sold in the USA and Canada are designed for use on 120V outlets only.

