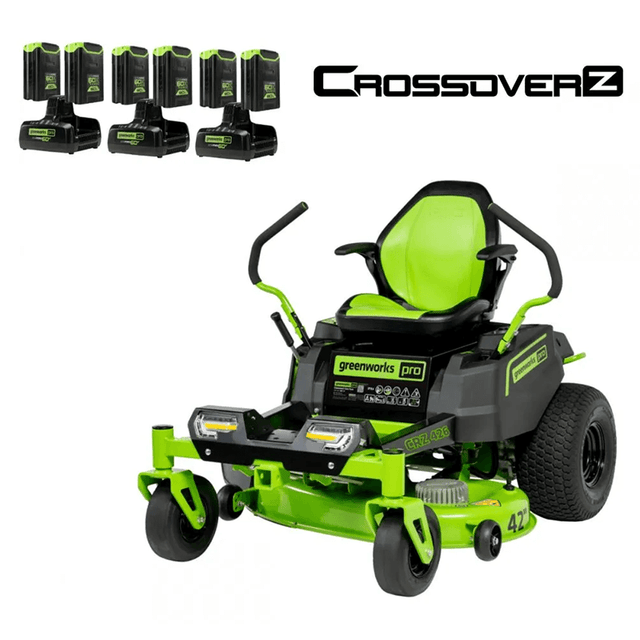
60V 42" Crossover Z Residential Zero Turn Lawn Mower, (6) 8.0Ah Batteries and (3) Dual Port Turbo Chargers | CRZ4261
SHOP WITH CONFIDENCE


Key Features
Key Features
- ✓Electric Start
- ✓Brushless Motor
- ✓LED Headlights
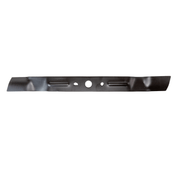
- ✓42" Heavy-Duty Steel Deck
- ✓Cargo Bed
- ✓4 Year Warranty
Compatible With :


60V 42" Crossover Z Residential Zero Turn Lawn Mower, (6) 8.0A...
Description
Description
Upgrade from the smell, hassle, and maintenance of gas to the Greenworks 60V Battery Powered Electric ZTR Lawn Mower. with Four Brushless Intelligent Motors powered by (6) 60V 8.0 Ah batteries, this mower delivers an equivalent 24 horsepower. The durable 42 in. stamped steel deck is equipped with two precision cut steel blades that offer adjustable cutting heights of 1.5 in. to 4.5 in. The integrated cargo bed provides on-the-go versatility and hauls up to 200 lb. Greenworks 42 in. 60V Zero Turn Lawn Mower and included six (6) 60V 8.0 Ah batteries are compatible with the Greenworks 60V system of 75+ tools and is backed by a 4-year warranty.
- Cutting Deck: Large 42" cut width
- Power 75+ Tools with any Greenworks 60V Battery
- Power Output: 24 HP
- Coverage: Up to 2.5 Acres
- Charge Time: 90m w/ (3) dual port rapid chargers
- Blade Tip Speed: Constant 17K ft/min
- Drive Speed: 8 mph, Industry’s Fastest Cutting
- Slope: 15° w/ traction control
Includes: One (1) 60V 42" Crossover Z Residential Zero Turn Lawn Mower, Six (6) 8 Ah Batteries and (3) Dual Port Turbo Chargers
Specifications
Specifications
-
Voltage60V
-
Amp Hours8Ah
-
Weight516 lbs.
-
Cutting Width42 in
-
Dimensions74.4''L × 54‘’W × 49‘’H
-
Forward Speed7.5 mph
-
Reverse Speed3 mph
-
Cutting Height Range1.5" - 4.5"
-
Bucket Capacity200 lbs
-
Towing Capacity (including bucket capacity)300 lbs
-
Warranty4-Year Warranty
Manuals
Manuals
-
Download:
-
Download:
-
Download:
-
Download:
Product Videos


Frequently Asked Questions
Frequently Asked Questions
- How should I store and care for my Greenworks battery to ensure the best performance and longest lifespan?
- Can I leave my battery in the charger after charging it?
- Why do batteries cost so much more than the tool?
- How do I store the battery? Can I leave the battery in the garage or shed?
- My battery is stuck in my tool. How do I get it out?
- How do I check the charge on my battery?
- Can I use any Greenworks battery in any Greenworks tool?
- Are there certain tools that can’t accept all same voltage batteries?
- Do all batteries of the same voltage use the same charger?
- The charger indicates that my battery is fully charged but I was just using it and it depleted. Why isn’t it charging?
- My charger is flashing red when I engage my battery. Why is this happening?
- My charger has a solid red light on it when I engage my battery. What is happening?
- Are your chargers made for 220V or 120V outlets?
We want you to get the most out of your tools, and that starts with understanding how to care for your battery. Proper storage and handling not only extend battery life but also ensure your tools are ready to perform when you need them most. A Quick Note on Lithium-Ion Battery Performance All Greenworks batteries use lithium-ion technology, which offers powerful, consistent performance without the memory effect found in older battery types. However, lithium-ion batteries are sensitive to temperature extremes—both heat and cold can affect performance and longevity. That’s why proper storage and care are essential for keeping your battery in peak condition. Best Practices for Battery Storage and Use: Store batteries indoors in a cool, dry location—away from direct sunlight, humidity, or extreme temperatures. This protects internal components and preserves performance. Only connect the battery to the charger when actively charging. When not in use, unplug the charger and keep the battery disconnected. If storing for an extended period, charge the battery fully before putting it away. Check the charge every couple of months. If it drops, recharge it before returning it to storage. This helps maintain battery health over time. Allow the battery to reach a safe operating temperature before use. For snow throwers and cold-weather operation, cold batteries may not power on. Let the battery warm to room temperature indoors before inserting it into the tool. Kindly note: Once the battery is at room temperature and installed, the current generated while the tool is running will help keep the battery warm. As long as the battery starts at room temperature, you should not experience issues even when working in cold outdoor conditions. For other tools/hot weather operation, if the battery has become hot from use or charging, allow it to cool before reinstalling. Indoor storage helps avoid performance issues related to both hot and cold environments and keeps your battery protected year-round.
The battery chargers do have auto cut offs to prevent it from over charging. However, we do advise customers to remove the battery from the charger after it has been fully charged and to also unplug the charger from the outlet, as this is good electrical safety practice to do so. This will also help to prevent false defect readings and allows the charger to reset itself each time it’s used to charge a battery.
The battery is the most important component for a battery-operated unit. Please be assured we price our batteries with the cost of material, manufacturing, and current market pricing in mind. Batteries are the costliest items to manufacture and ship in any kit. Full kits including a tool, battery, and charger are priced affordably so that consumers can begin building that line of tools and move forward purchasing tool-only units. When you purchase batteries on their own, it is more notable the cost that they carry.
When the battery is not in use, we suggest storing it indoors, in a cool dry area - away from direct sunlight. Leave the charger unplugged and the battery disconnected from the charger unless it needs charging. It is recommended to store the battery with a full charge, and if it is being stored for a period where no use is expected, to check on the charge every couple of months. If you notice the charge has dropped, we advise charging the battery back up to full before returning it to its safe storage place. Following these steps will ensure you receive the most out of the battery life.
60V/ 80V Products: To remove the battery, push and hold the battery release button. Then, pull the battery pack straight out. In some cases, if the springs underneath have gotten locked down you might have to give a small push to the top of the battery to re-engage them to help the battery pop up. The battery pack fits snugly into the product to prevent accidental dislodging while in use; it may require a strong pull to remove. Before use, be sure that the rails on the battery and product are free of debris that could cause the battery to get stuck. 24V/ 40V Products: To remove the battery, press the latch button on the battery pack down and hold. Pull the battery pack out of the handle. The battery pack fits snugly into the product to prevent accidental dislodging while in use; it may require a strong pull to remove. Before use, be sure that the rails on the battery and product are free of debris that could cause the battery to get stuck.
Press the battery capacity indicator (BCI) button located at the end of the battery. The lights will illuminate according to the battery capacity level. Please note this switch does require a firm direct push using the tip of your finger. If the button is not being fully engaged, the lights will not activate. Please also be advised the lights only stay on for a few seconds and will automatically turn off. Another reason the lights will not power on is if the battery is completely depleted of power and needs to be charged.
Our batteries are interchangeable with tools that are of the same voltage platform only. The difference between batteries of the same voltage is the ampere-hour (Ah) rating. The higher the ampere-hour (Ah) rating on the battery is the more run time it has to offer.
There are a few exceptions. • Our 80V 20” snow thrower models 2600402 / 2605202 / 2601302 manufactured prior to September of 2017 can only use 2.0Ah or 2.5Ah battery models. • Our 60V 8.0Ah battery model 2957102 cannot be used in the following tools due to the height: dual-port lawnmowers, pressure washers, or the wet/dry vacuum.
Yes, they do. Each product line has designated charger models that can charge all batteries in that voltage platform, no matter the Ah rating.
Putting a battery that was just in use onto the charger often results in a false full charge signal. Remove the battery from the charger and allow it to rest in a room temperature area for approximately 10-15 minutes before charging.
When the battery is inserted into the charger and the status LED blinks red, remove the battery from the charger for 1 minute, then reinsert. If the status LED blinks green, then the battery is properly charging. If the status LED is still blinking red, remove the battery and unplug the charger for 1 minute. After 1 minute, plug in the charger and reinsert the battery. If the status LED blinks green, then the battery is properly charging. If the status LED is still blinking red, then this likely indicates an issue with the battery or charger and should be taken care of either with our warranty team or by means of replacement.
This typically indicates that the battery is at the wrong temperature to be charged. Allow the battery and charger to rest indoors at room temperature until they are no longer hot/cold and attempt charging again.
Greenworks chargers sold in the USA and Canada are designed for use on 120V outlets only.