Laveuse à pression sans fil 24 V, 600 PSI (lb/po²), 0,8 GPM, batterie 4,0 Ah et chargeur inclus
Principales caractéristiques
Principales caractéristiques
- ✓Démarrage par bouton-poussoir
- ✓Léger et portable
- ✓Opération silencieuse
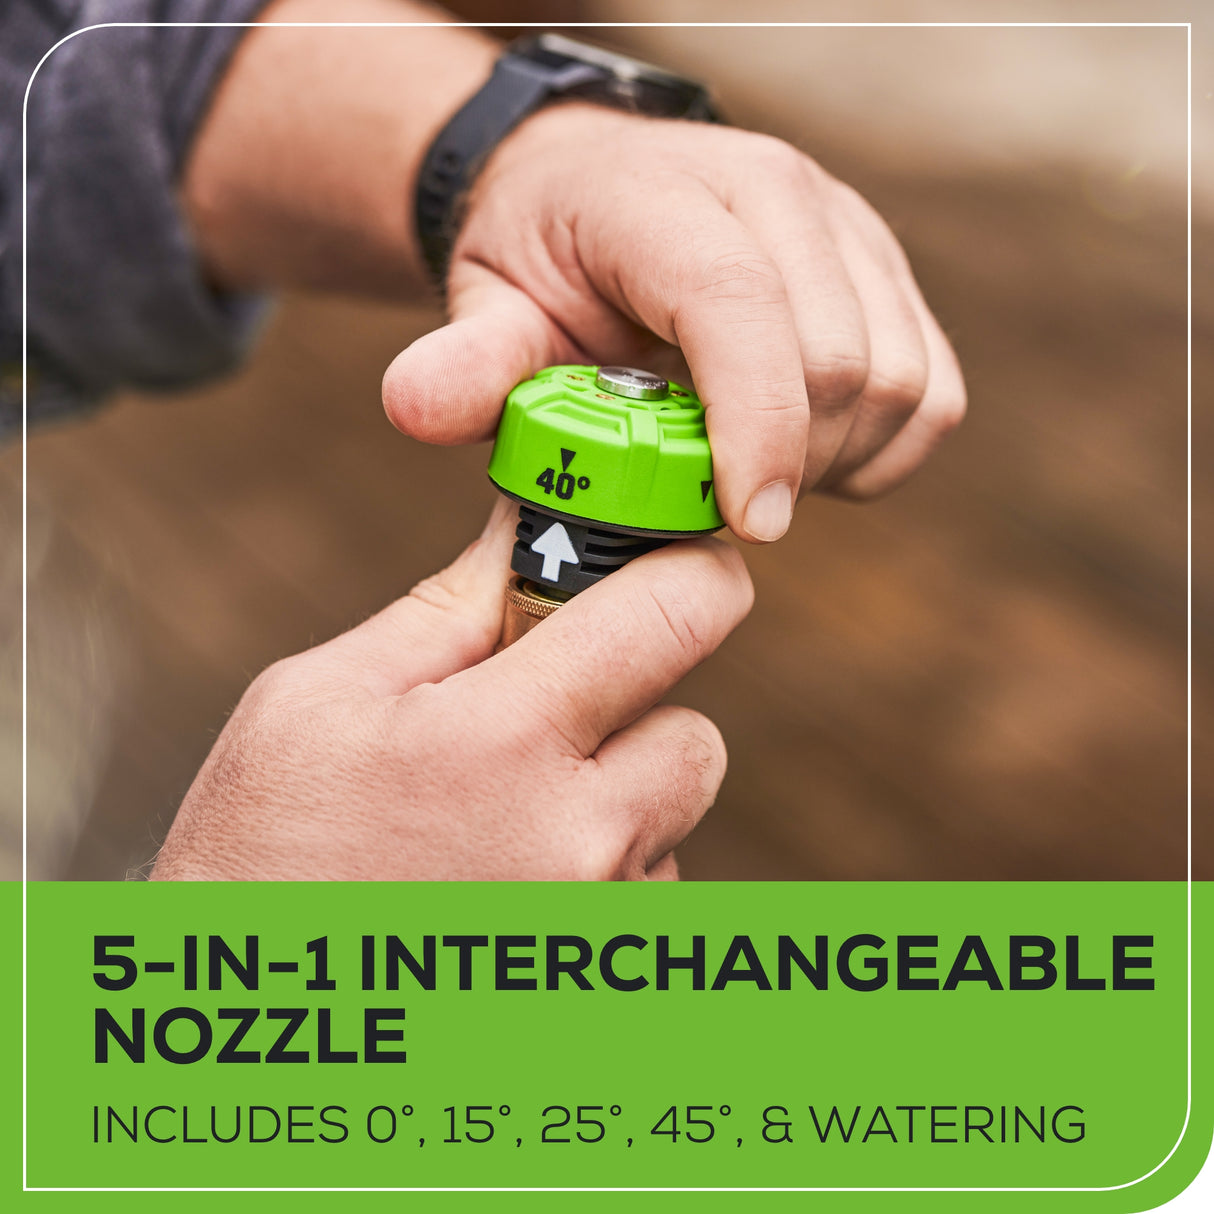
- ✓5-in-1 Nozzle Head
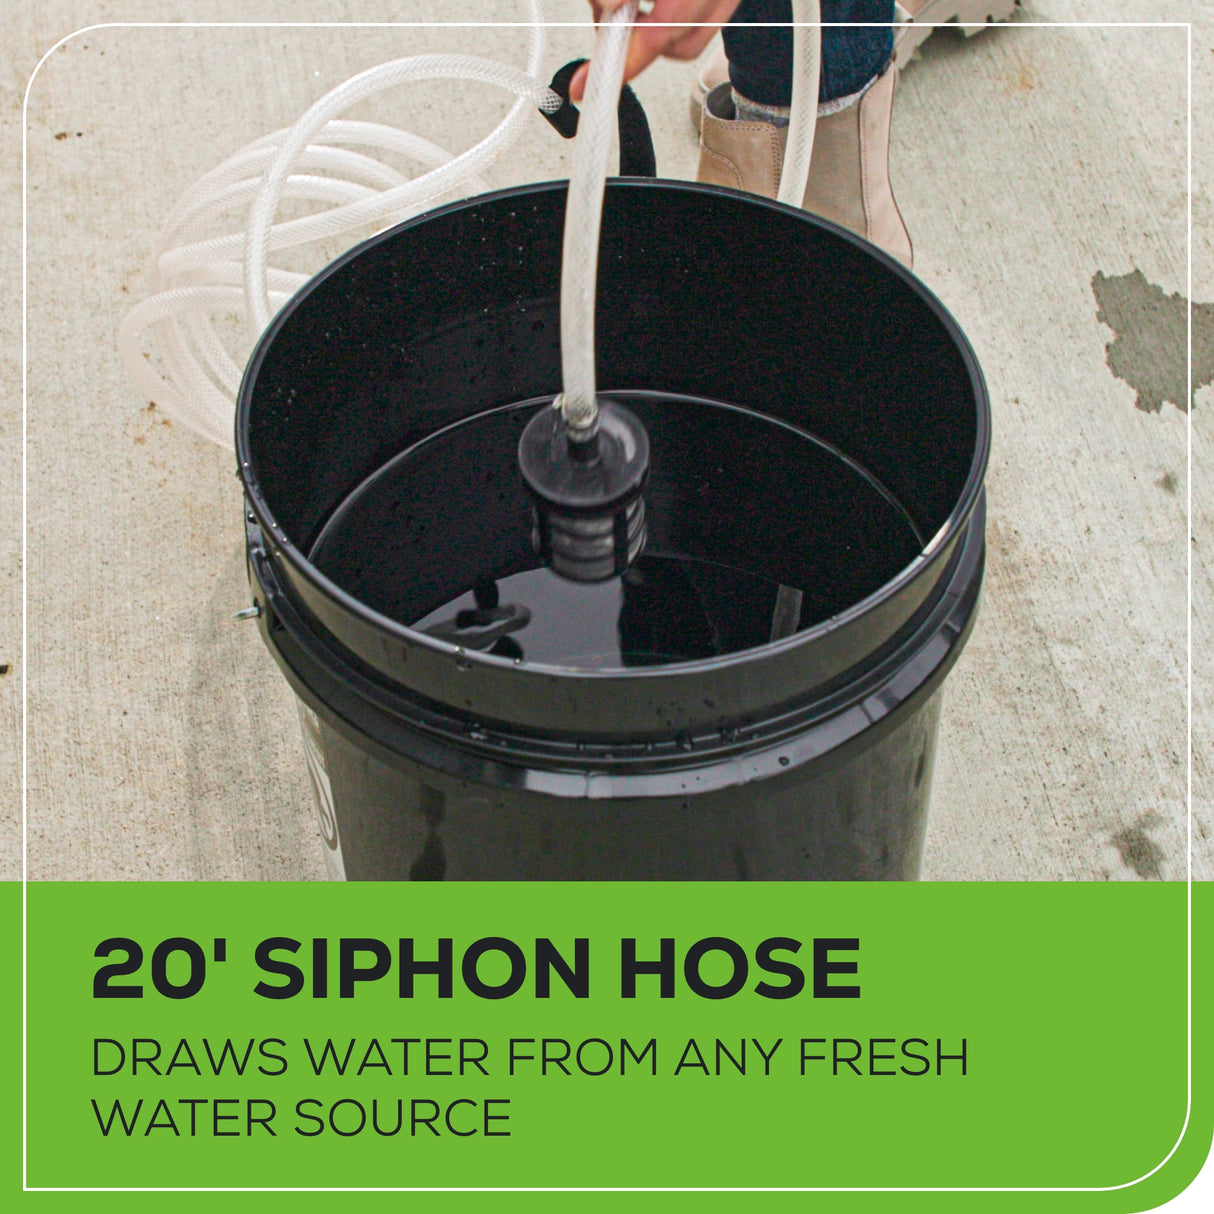
- ✓20' Siphon Hose included - Draw water from any fresh water source
- ✓Batterie et chargeur inclus
- ✓Plus de 150 outils PowerAll™ 24 V
- ✓Garantie de 3 ans
Garantie
Garantie

Compatible With :
Description
Description
Bienvenue à La Vie. Propulsé. Par Greenworks. Voici la laveuse à pression électrique la plus puissante de l'industrie ! La lavesue à pression sans fil à eau froide Greenworks 24 V avec batterie USB 4,0 Ah et chargeur est compacte, légère et facile à utiliser. Avec 600 PSI (lb/po²) à 0,8 GPM, il y a suffisamment de puissance pour nettoyer les fenêtres, les meubles d'extérieur, les voitures, les bateaux, les véhicules récréatifs et plus encore. Il est doté d'une buse polyvalente 5 en 1 pour nettoyer la saleté et les débris d'une variété de surfaces et fonctionne avec n'importe quel boyau d'arrosage typique. Lorsqu'un robinet de boyau d'arrosage n'est pas disponible, le boyau auto-siphonnant de 20 pieds tire l'eau de n'importe quelle source d'eau douce. La plateforme lithium-ion 24 V de Greenworks alimente plus de 125 produits d'intérieur et d'extérieur, notamment des tondeuses, des souffleurs, des coupe-herbes, des scies à chaîne, des outils électroportatifs et bien plus encore. Bénéficiant d'une garantie de 3 ans sur l'outil et la batterie, il est conçu pour durer des années.
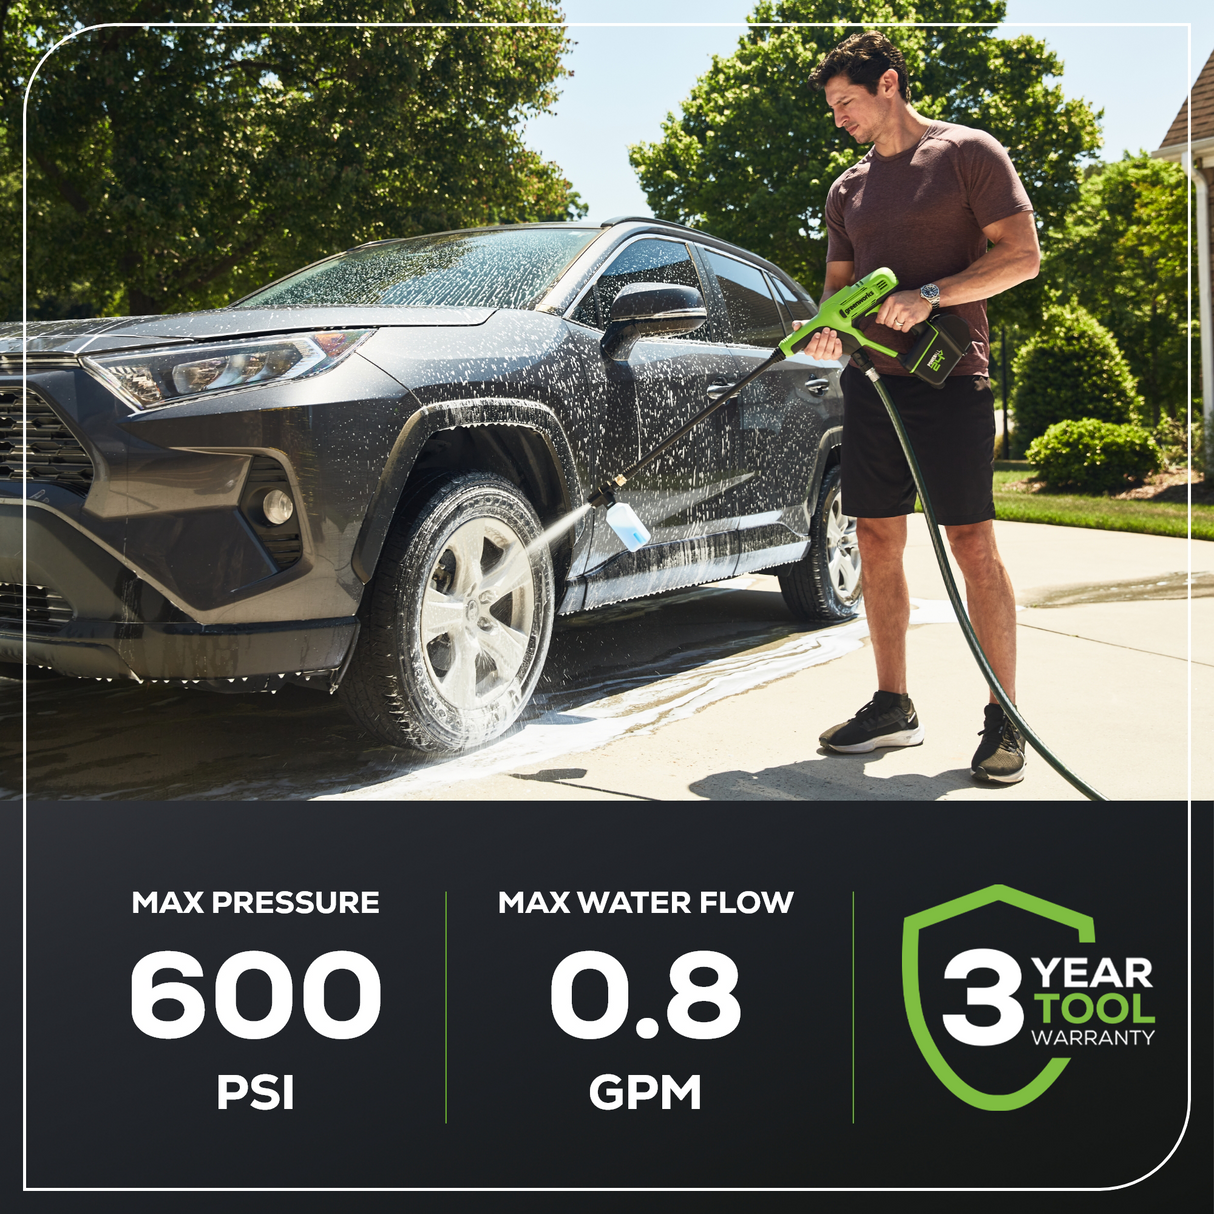
- [PUISSANCE] : Cette laveuse à pression électrique de 600 PSI (lb/po²) aide à éliminer la saleté et la crasse avec jusqu'à 0,8 GPM de puissance de nettoyage exceptionnelle. Idéal pour les applications légères comme le nettoyage des voitures, des bateaux, des véhicules récréatifs, des terrasses, des fenêtres et plus encore.
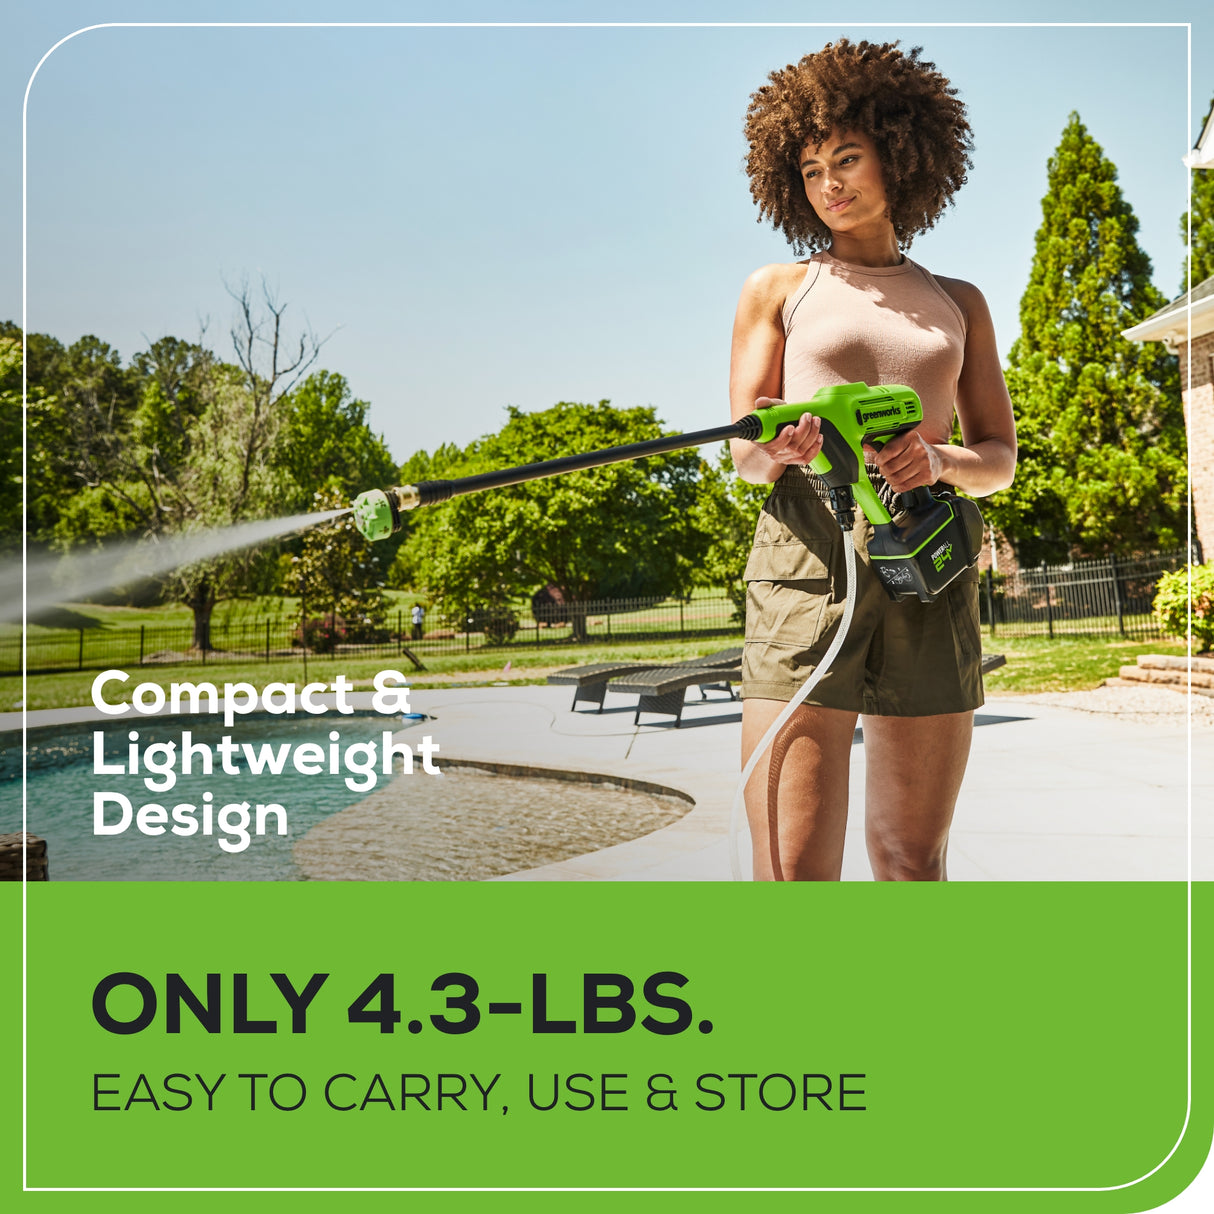
- [PORTABLE] : Légère et facile à utiliser. Lorsqu'un robinet de boyau d'arrosage n'est pas disponible, le boyau auto-siphonnant de 20 pieds tire l'eau de n'importe quelle source d'eau douce.
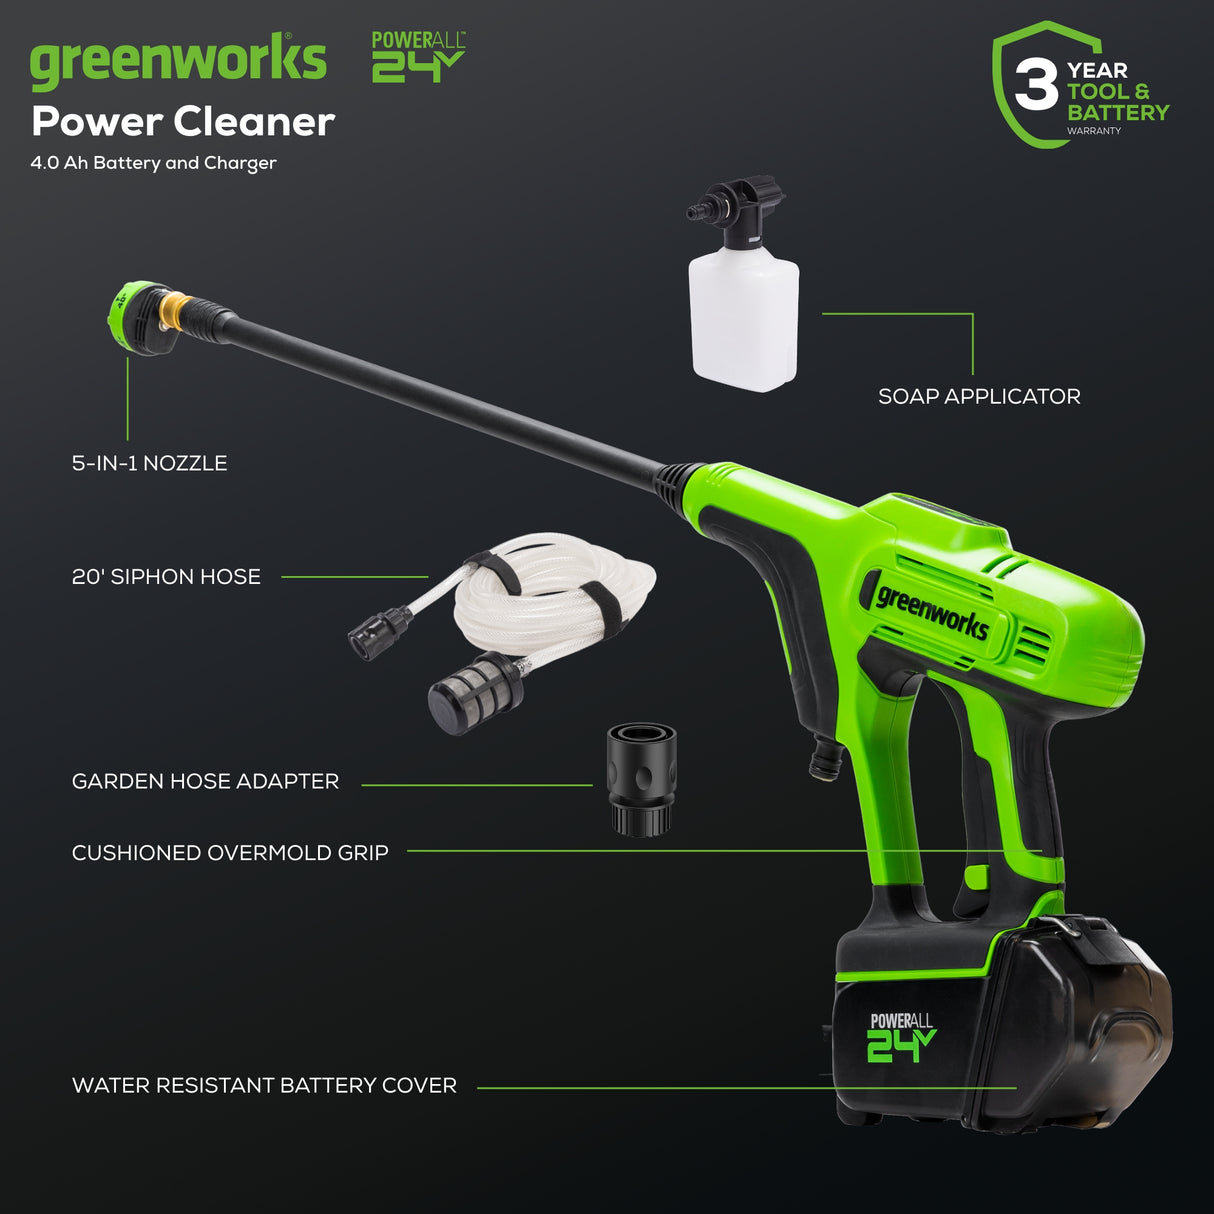
- [POLYVALENTE] : Buse réglable 5 en 1 avec degrés de pulvérisation sélectionnables - 0º, 15°, 25º, 40º et pulvérisation de douche.
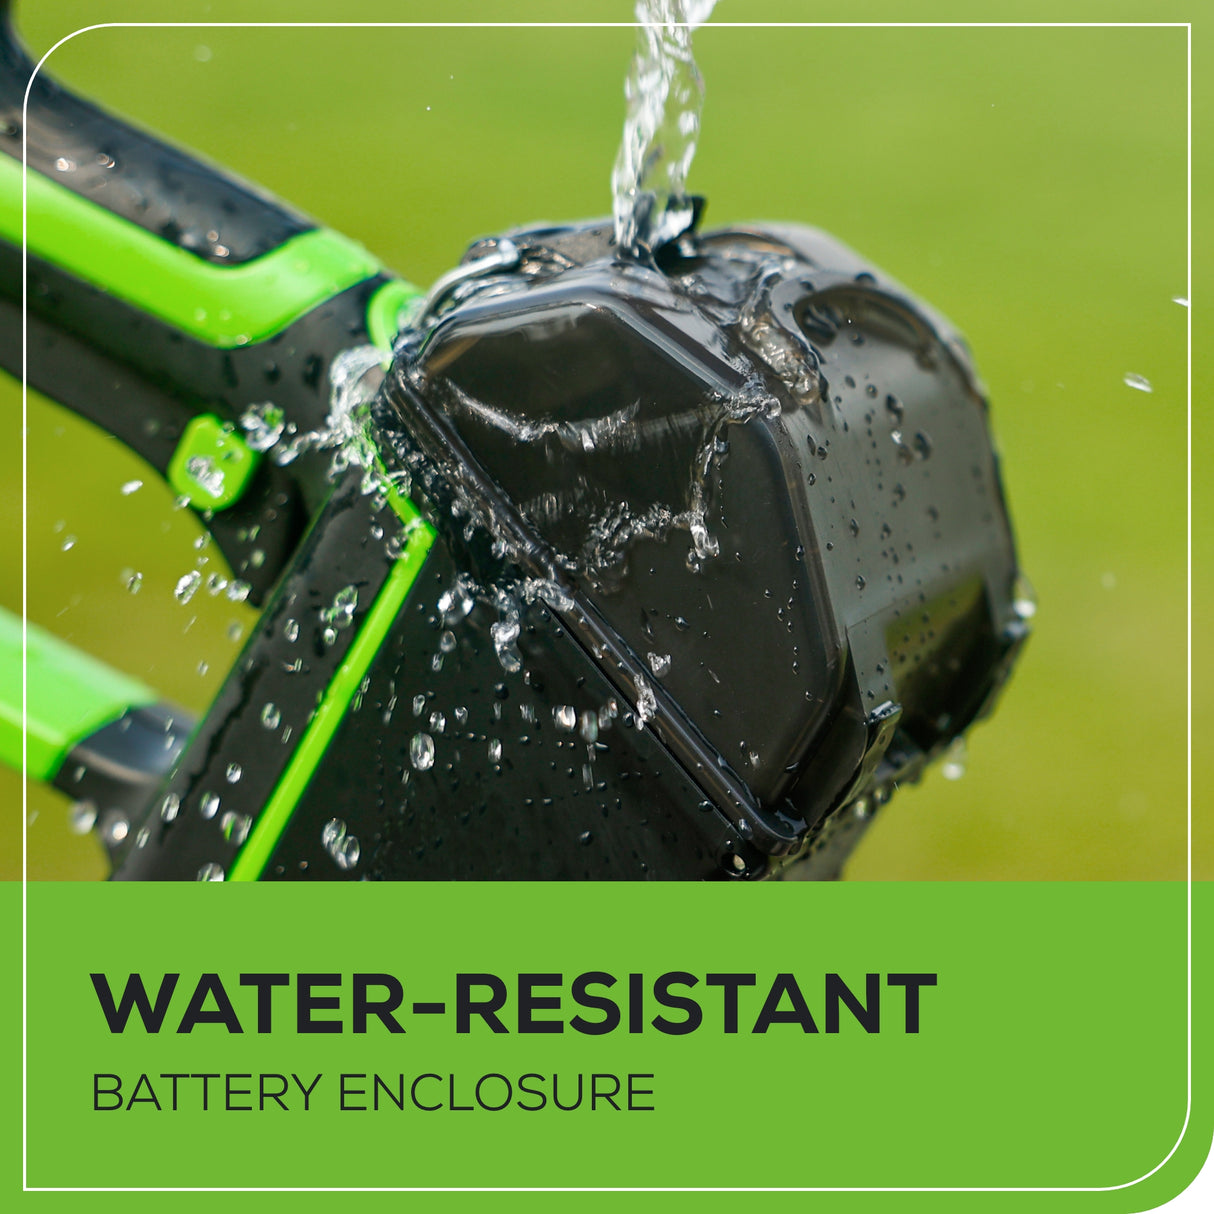
- [CARACTÉRISTIQUES] : Compartiment à batteries résistant à l'eau pour une protection supplémentaire et compatible avec toutes les batteries Greenworks 24 V ; La poignée moulée en caoutchouc antidérapant est confortable et ergonomique pour moins de fatigue de l'utilisateur. De plus, l'applicateur de savon inclus vous permet d'éliminer même les saletés les plus tenaces.
- [SILENCIEUSE] : Un faible bruit signifie moins de maux de tête pour vous et vos voisins. Avec seulement 89 dB, vous pouvez laver à haute pression à n'importe quel moment de la journée !
- [PERFORMANCES CERTIFIÉES] : Laveuse à pression certifiée par la « Cleaning Equipment Trade Association », ce modèle offre des performances garanties par une source fiable.
Spécifications
Spécifications
-
Type d'alimentationÀ batterie
-
Voltage24 V
-
Ports de batterieSimple
-
Batterie(s) incluse(s)(1) batterie 24 V 4,0 Ah
-
Pression maximale en lb/po² (PSI)600
-
Débit maximal en gallons par minute (GPM)0,8
-
Puissance nominale du moteur (kW)0,4 kW
-
Type de pompeAxiale
-
Soupape de décharge thermiqueNon
-
Unités de nettoyage (C.U.)480 C.U.
-
Longueur du cordon d'alimentation (pieds)20 pi.
-
Buse(s) incluse(s)Buse de pulvérisation 5-en-1 (0°, 15°, 25°, 40° et Mode douche)
-
Type d'unitéPortable
-
Réservoir de savon à bordNon
-
Capacité de la bouteille de savon500 mL
-
Température maximale de l'eau d'entrée104 °F (40 °C)
-
Dimensions du produit (Assemblé)31,4 po. x 3,9 po. x 21,6 po.
-
Poids de l'outil sans batterie5,63 lb.
-
Dimensions du colis17,7 po. x 5,9 po. x 15,7 po.
-
Poids du colis11,2 lb (5,1 kg)
Manuels
Manuels
-
Télécharger :
Comprend
Comprend
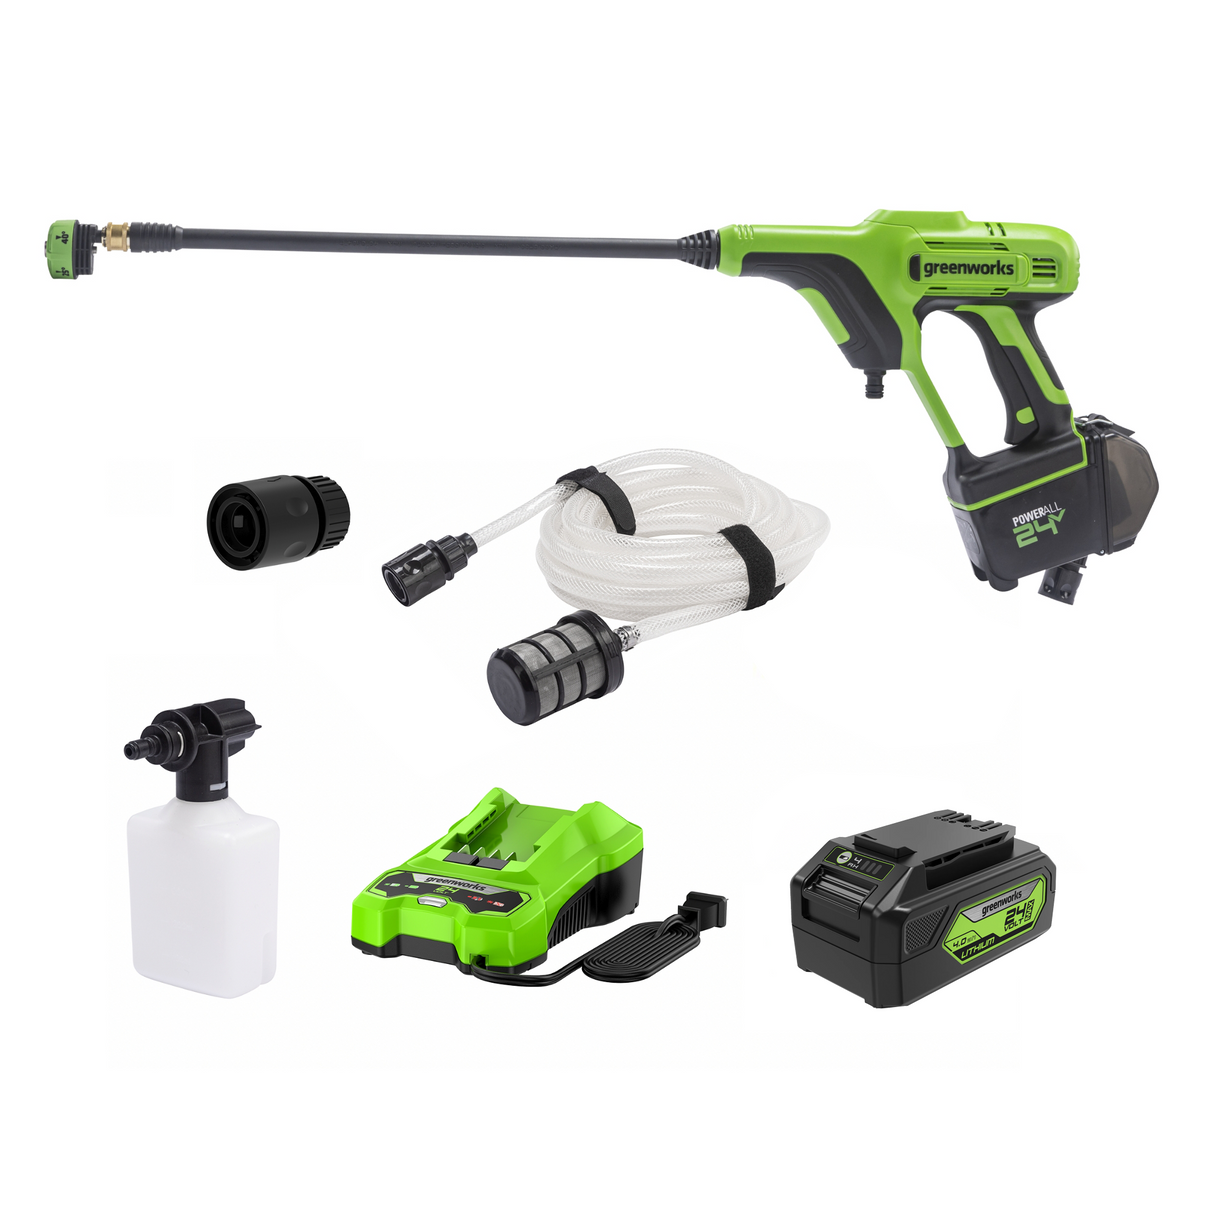
- Laveuse à pression 24 V, 600 PSI (lb/po²), 0,8 GPM
- Buse de pulvérisation 5-en-1
- Lance de pulvérisation
- Adaptateur de boyau d'arrosage
- Boyau siphon de 20 pieds
- Applicateur de savon
- Outil déblayage de buse de pulvérisation
- Manuel d'instructions
Vidéos de produits
Foire aux questions
Foire aux questions
- Quel savon dois-je utiliser avec ma laveuse à pression ?
- Ma source d'eau doit-elle avoir un certain PSI (lb/po²) pour que l'appareil fonctionne correctement ?
- Puis-je alterner entre l'application du savon et le rinçage ?
- Comment hiverner ma laveuse à pression ?
- Puis-je utiliser de l’eau chaude avec vos laveuses à pression ?
- Quelle est la taille des raccords filetés sur la laveuse à pression ?
- Quelle est la taille des buses ?
- Ma laveuse à pression ne démarre pas ou je l'ai démarrée, mais elle continue de s'éteindre, de pulser ou n'atteint pas la haute pression. Quel est le problème ?
- Puis-je utiliser un boyau haute pression plus long ?
- Avez-vous des lances allongées ?
- À quelles utilisations conviennent les différentes buses ?
- Puis-je laisser ma batterie dans le chargeur après l'avoir chargée ?
- Pourquoi les batteries coûtent-elles beaucoup plus cher que l’outil ?
- Comment dois-je entreposer la batterie ? Puis-je laisser la batterie dans le garage ou dans la cabane ?
- Ma batterie est coincée dans mon outil. Comment la retirer ?
- Comment vérifier la charge de ma batterie ?
- Puis-je utiliser n’importe quelle batterie Greenworks dans n’importe quel outil Greenworks ?
- Existe-t-il certains outils qui ne peuvent pas accepter toutes les batteries de même voltage ?
- Est-ce que toutes les batteries de même voltage utilisent le même chargeur ?
- La température de la batterie est-elle importante ?
- Le chargeur indique que ma batterie est complètement chargée, mais je viens de l'utiliser et elle est épuisée. Pourquoi ne se charge-t-elle pas ?
- Mon chargeur clignote en rouge lorsque j'active ma batterie. Pourquoi cela se produit-il ?
- Mon chargeur a un voyant rouge fixe allumé lorsque j'active ma batterie. Que se passe-t-il ?
- Vos chargeurs sont-ils conçus pour des prises 220 V ou 120 V ?
Nous vous recommandons d'utiliser uniquement un savon pour laveuse à pression spécifique. Vous pouvez utiliser n'importe quelle marque de savon pour laveuse à pression, à condition qu'elle ne contienne pas de produits chimiques agressifs tels que de l'eau de Javel, des produits alcalins ou de l'ammoniaque. Assurez-vous de suivre les instructions figurant sur le savon pour laveuse à pression pour savoir s'il doit être dilué ou non ; le savon doit avoir une consistance aqueuse.
Oui, la pression d'entrée idéale est de 60 PSI (lb/po²). Cependant, l'appareil tolère entre 45 et 75 PSI (lb/po²). Si la pression d'entrée est inférieure à 45 PSI (lb/po²), cela entraînera une chute de pression et la machine ne se mettra pas correctement sous pression. Cela provoque souvent des vibrations et des crachotements de l'appareil. Au-delà de 75 PSI (lb/po²), l'appareil peut subir des dommages internes dus à une surpression, à une rupture des joints, au déclenchement de la vanne thermique, etc. Si l'appareil n'a pas le PSI (lb/po²) correct, l'appareil ne fonctionnera pas correctement et le moteur peut être endommagé.
Oui, vous pouvez ! Pour les appareils avec un réservoir de savon intégré : le savon ne peut être appliqué qu'avec la buse de savon noire, remplacez-la simplement par la buse appropriée dont vous avez besoin pour le rinçage. Attendez quelques secondes que la mousse de savon disparaisse de la conduite, puis vous aurez de l'eau propre. Pour les appareils qui utilisent une bouteille de savon : pour rincer, vous devrez retirer la bouteille de savon et rattacher la lance avec la buse appropriée dont vous avez besoin pour le rinçage.
La procédure optimale consiste à utiliser un économiseur de pompe pour laveuse à pression, disponible dans la plupart des quincailleries. Veuillez consulter la procédure optimale d'hivernage ci-dessous. • Débranchez tous les raccordements d'eau (boyau d'arrosage). • Allumez la machine pendant quelques secondes, jusqu'à ce que l'eau restante dans la pompe sorte. Éteignez immédiatement. • Utilisez un économiseur de pompe pour laveuse à pression - suivez les instructions fournies sur l'économiseur de pompe. • Enroulez soigneusement le cordon électrique et le boyau, en vous assurant qu'il n'y a pas de pli. Idéalement, nous vous conseillons de ranger la machine et les accessoires dans une pièce qui n'atteint pas les températures de congélation. Ne pas ranger à proximité d'une fournaise ou d'autres sources de chaleur, car cela pourrait dessécher les joints de la pompe.
Nous proposons uniquement des laveuses à pression à eau froide ; la température maximale de l'eau d'entrée ne doit pas dépasser 40 °C (104 °F).
Tous les raccords filetés de nos laveuses à pression sont des raccords M22 de 14 mm.
Nos laveuses à pression utilisent des buses à raccord rapid de ¼ po.
Il existe quelques facteurs qui peuvent provoquer ces réactions, comme un excès d'air dans la pompe ou une buse bouchée/défectueuse. Voir toutes les options de dépannage ci-dessous. Nettoyage des buses obstruées Au fil du temps, les buses de la laveuse à pression peuvent accumuler de la poussière, de la saleté et du calcium, ce qui entraîne un dysfonctionnement de la laveuse à pression pendant son utilisation. Pour nettoyer les buses, faites-les tremper dans un mélange 50/50 de vinaigre blanc et d'eau tiède pendant au moins 15 minutes. Ensuite, passez votre outil de nettoyage de buse ou votre trombone à travers l'extrémité du trou de la buse pour faire sortir les débris. Après avoir fait cela, rincez-les à l'eau tiède. Purger l'air de la laveuse à pression Configurez l'appareil comme d'habitude et assurez-vous de ne pas utiliser de rallonge. Retirez toute buse qui pourrait être connectée à l'extrémité de la lance. Assurez-vous que vous avez un voyant vert sur le DDFT (disjoncteur différentiel de fuite à la terre) du cordon d'alimentation. Allumez votre boyau d'arrosage mais laissez la laveuse à pression éteint. Avec la laveuse à pression éteint, appuyez sur la gâchette pendant environ 3 minutes, en laissant l'eau couler dans l'appareil sans pression. Ce faisant, vous purgez l'appareil de l'air qui pourrait être coincé dans la pompe. Après 3 minutes, rallumez l'appareil. Réinstallez l'une de vos buses propres et continuez à utiliser l'appareil. À ce moment, si l'appareil s'éteint lorsqu'une buse est installée, assurez-vous d'essayer toutes les buses. Une buse défectueuse peut provoquer l'arrêt de l'appareil. Composants supplémentaires à vérifier : • Assurez-vous qu'une buse est connectée. Assurez-vous d'essayer toutes les buses. • Assurez-vous que la source d'eau est complètement ouverte et qu'elle est d'au moins 60 PSI (lb/po²) (consultez : Ma source d'eau doit-elle être d'un certain PSI pour faire fonctionner l'appareil correctement ?) • Vérifiez qu'il y a au moins 10 pi de boyau d'arrosage sans restriction entre le raccord du boyau et l'appareil, tout pli empêchera le débit d'eau d'entrer dans l'appareil et empêchera la pression appropriée. • Pour de meilleurs résultats, utilisez un boyau d'arrosage de 1 po (25 mm) ou 5/8 po (16 mm). • Vérifiez que l'arrivée d'eau n'est pas obstruée. Débranchez le boyau d'arrosage, retirez le filtre et rincez à l'eau tiède. • Assurez-vous d'utiliser une prise qui fonctionne. Assurez-vous d'en essayer plusieurs !
Bien que vous puissiez utiliser un boyau haute pression plus long, veuillez noter que la pression diminuera.
Malheureusement, nous ne proposons pas de rallonges. Bien que vous puissiez trouver quelque chose de compatible avec une autre marque, sachez que la pression pourrait être affectée.
0° - Buse rouge : Cette buse est généralement utilisée pour éliminer les taches tenaces comme la rouille et les débris du béton et du métal. Vous pouvez également l'utiliser pour éliminer la boue incrustée des équipements de construction, agricoles ou de pelouse lourds. N'utilisez pas cette buse sur du bois ou des parements de maison ou pour laver une voiture, car ce jet est très fort et puissant et peut endommager une surface molle. 15° - Buse jaune : La buse jaune de laveuse à pression offre une grande polyvalence avec sa pointe à angle de 15°. Appelée pointe de lavage, car elle fournit une pression adéquate pour éliminer la saleté des surfaces, mais est conçue pour ne pas endommager de nombreuses surfaces. Cette buse de laveuse à pression est conçue pour « balayer » le feuillage ou les débris en raison de son grand angle. Cette pointe est polyvalente en raison de sa large zone de nettoyage et de sa forte application de pression. 25° - Buse verte : La buse verte à 25 degrés est idéale pour balayer la saleté et la boue. Utilisez-la pour balayer les feuilles des terrasses, des entrées, des allées et des trottoirs. Elle peut également être utilisée pour éliminer les taches de moisissure légères et éliminer les algues et les bactéries accumulées dans les piscines. 40° – Buse blanche : La pointe blanche à 40°, appelée pointe « en éventail », crée la zone de nettoyage la plus large avec une pression relativement faible. Cette pointe de laveuse à pression est idéale pour les applications de nettoyage légères ou délicates. Elle est recommandée pour un nettoyage léger sur les terrasses en bois et autres surfaces douces ou délicates. 75° Savon – Buse noire : La buse de couleur noire est une buse à détergent basse pression. Vous l'utilisez lorsque vous appliquez votre détergent préféré pour vos projets de nettoyage. Buse turbo : La buse tourne dans un motif de pulvérisation de zéro à 15° dans un mouvement circulaire pour décomposer la saleté et la crasse tenaces. Le motif de pulvérisation peut couvrir une zone de 4 à 8 pouces de large, selon la distance entre la pointe et la surface à nettoyer.
Les chargeurs de batterie sont dotés d'un dispositif d'arrêt automatique pour éviter toute surcharge. Cependant, nous conseillons aux clients de retirer la batterie du chargeur une fois qu'elle est complètement chargée et de débrancher également le chargeur de la prise, car il s'agit d'une bonne pratique de sécurité électrique. Cela permettra également d'éviter les fausses lectures de défauts et permettra au chargeur de se réinitialiser à chaque fois qu'il est utilisé pour charger une batterie.
La batterie est le composant le plus important d'un appareil à batterie. Soyez assuré que nous fixons le prix de nos batteries en tenant compte du coût des matériaux, de la fabrication et des prix actuels du marché. Les batteries sont les éléments les plus coûteux à fabriquer et à expédier dans n'importe quel ensemble. Les ensembles complets comprenant un outil, une batterie et un chargeur sont proposés à un prix abordable afin que les consommateurs puissent commencer à construire cette gamme d'outils et passer à l'achat d'appareils contenant uniquement des outils. Lorsque vous achetez des batteries seules, le coût qu'elles entraînent est plus important.
Lorsque la batterie n'est pas utilisée, nous vous suggérons de la entreposer à l'intérieur, dans un endroit frais et sec, à l'abri de la lumière directe du soleil. Laissez le chargeur débranché et la batterie déconnectée du chargeur, sauf si elle doit être rechargée. Il est recommandé d'entreposer la batterie complètement chargée et, si elle est entreposée pendant une période où aucune utilisation n'est prévue, de vérifier la charge tous les deux mois. Si vous remarquez que la charge a baissé, nous vous conseillons de recharger complètement la batterie avant de la remettre dans son lieu d'entreposage sûr. En suivant ces étapes, vous vous assurerez de tirer le meilleur parti de la durée de vie de la batterie.
Produits 60 V / 80 V : Pour retirer la batterie, appuyez sur le bouton de déverrouillage de la batterie et maintenez-le enfoncé. Ensuite, retirez la batterie en tirant dessus. Dans certains cas, si les ressorts situés en dessous se sont bloqués, vous devrez peut-être appuyer légèrement sur le haut de la batterie pour les réengager et aider la batterie à sortir. La batterie s'insère parfaitement dans le produit pour éviter tout délogement accidentel pendant l'utilisation ; il peut être nécessaire de tirer fort pour la retirer. Avant utilisation, assurez-vous que les rails de la batterie et du produit sont exempts de débris qui pourraient coincer la batterie. Produits 24 V/40 V : Pour retirer la batterie, appuyez sur le bouton de verrouillage de la batterie et maintenez-le enfoncé. Retirez la batterie de la poignée. La batterie s'insère parfaitement dans le produit pour éviter tout délogement accidentel pendant l'utilisation ; il peut être nécessaire de tirer fort pour la retirer. Avant utilisation, assurez-vous que les rails de la batterie et du produit sont exempts de débris qui pourraient coincer la batterie.
Appuyez sur le bouton indicateur de capacité de la batterie (BCI) situé à l'extrémité de la batterie. Les voyants s'allumeront en fonction du niveau de capacité de la batterie. Veuillez noter que cet interrupteur nécessite une pression directe et ferme du bout du doigt. Si le bouton n'est pas complètement enfoncé, les voyants ne s'allumeront pas. Veuillez également noter que les voyants ne restent allumés que quelques secondes et s'éteignent automatiquement. Une autre raison pour laquelle les voyants ne s'allument pas est que la batterie est complètement déchargée et doit être rechargée.
Nos batteries sont interchangeables uniquement avec des outils de la même plateforme de voltage. La différence entre les batteries de même voltage est la capacité en ampères-heures (Ah). Plus la capacité en ampères-heures (Ah) de la batterie est élevée, plus elle offre d'autonomie.
Il existe quelques exceptions. • Nos modèles de souffleuses à neige 80 V 20 po 2600402 / 2605202 / 2601302 fabriqués avant septembre 2017 ne peuvent utiliser que des modèles de batterie de 2,0 Ah ou 2,5 Ah. • Notre modèle de batterie 60 V 8,0 Ah 2957102 ne peut pas être utilisé dans les outils suivants en raison de la hauteur : tondeuses à double port, laveuses à pression ou aspirateur à déchets sec/humide.
Oui, c'est le cas. Chaque gamme de produits dispose de modèles de chargeurs spécifiques qui peuvent charger toutes les batteries de cette plateforme de voltage, quelle que soit leur capacité en Ah.
La température de la batterie avant utilisation ne doit pas être trop élevée ou trop basse. Pour les souffleuses à neige, si la batterie est trop froide, elle risque de ne pas fonctionner. Laissez la batterie atteindre la température ambiante avant utilisation. Pour nos autres outils, laissez la batterie refroidir avant utilisation si elle est trop élevée. Pour éviter les problèmes de température de la batterie, les batteries doivent être gardées à l'intérieur dans un endroit sec et frais. Les informations sur l'entreposage et la température de la batterie se trouvent dans votre manuel d'instructions.
Placer une batterie qui vient d'être utilisée sur le chargeur entraîne souvent un faux signal de charge complète. Retirez la batterie du chargeur et laissez-la reposer dans une zone à température ambiante pendant environ 10 à 15 minutes avant de la charger.
Lorsque la batterie est insérée dans le chargeur et que le voyant d'état clignote en rouge, retirez la batterie du chargeur pendant 1 minute, puis réinsérez-la. Si le voyant d'état clignote en vert, la batterie se charge correctement. Si le voyant d'état clignote toujours en rouge, retirez la batterie et débranchez le chargeur pendant 1 minute. Après 1 minute, branchez le chargeur et réinsérez la batterie. Si le voyant d'état clignote en vert, la batterie se charge correctement. Si le voyant d'état clignote toujours en rouge, cela indique probablement un problème avec la batterie ou le chargeur et doit être résolu soit par notre équipe de garantie, soit par remplacement.
Cela indique généralement que la batterie n'est pas à la bonne température pour être chargée. Laissez la batterie et le chargeur reposer à l'intérieur à température ambiante jusqu'à ce qu'ils ne soient plus chauds/froids et essayez de les charger à nouveau.
Les chargeurs Greenworks vendus aux États-Unis et au Canada sont conçus pour être utilisés uniquement sur des prises 120 V.

