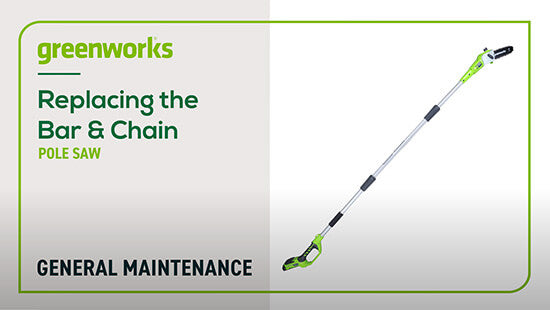
Scie à perche 60 V, 10 pouces avec accessoire taille-haie 60 V, 20 pouces, batterie de 2,0 Ah et chargeur inclus
Garantie
Garantie

Compatible With :
Description
Description
Spécifications
Spécifications
-
Voltage60 V
-
Poids12,1 livres
-
Dimensions du produit assemblé110,2 po. × 5,1 po. × 7,8 po.
-
Dimensions de l'emballage46,4 po. × 9,4 po. × 5,1 po.
-
Poids du colis17,4 lb. (7,9 kg)
-
Ampères-heures de la batterie2,0 Ah
-
Indicateur de batterieAffichage de charge sur la batterie
-
Coupes par charge (bois 4x4)Jusqu'à 100 coupes
-
Chargeur inclusChargeur Gen - II Rapid 3A
-
Temps de charge pour une batterie de 2,0 AhJusqu'à 60 minutes
-
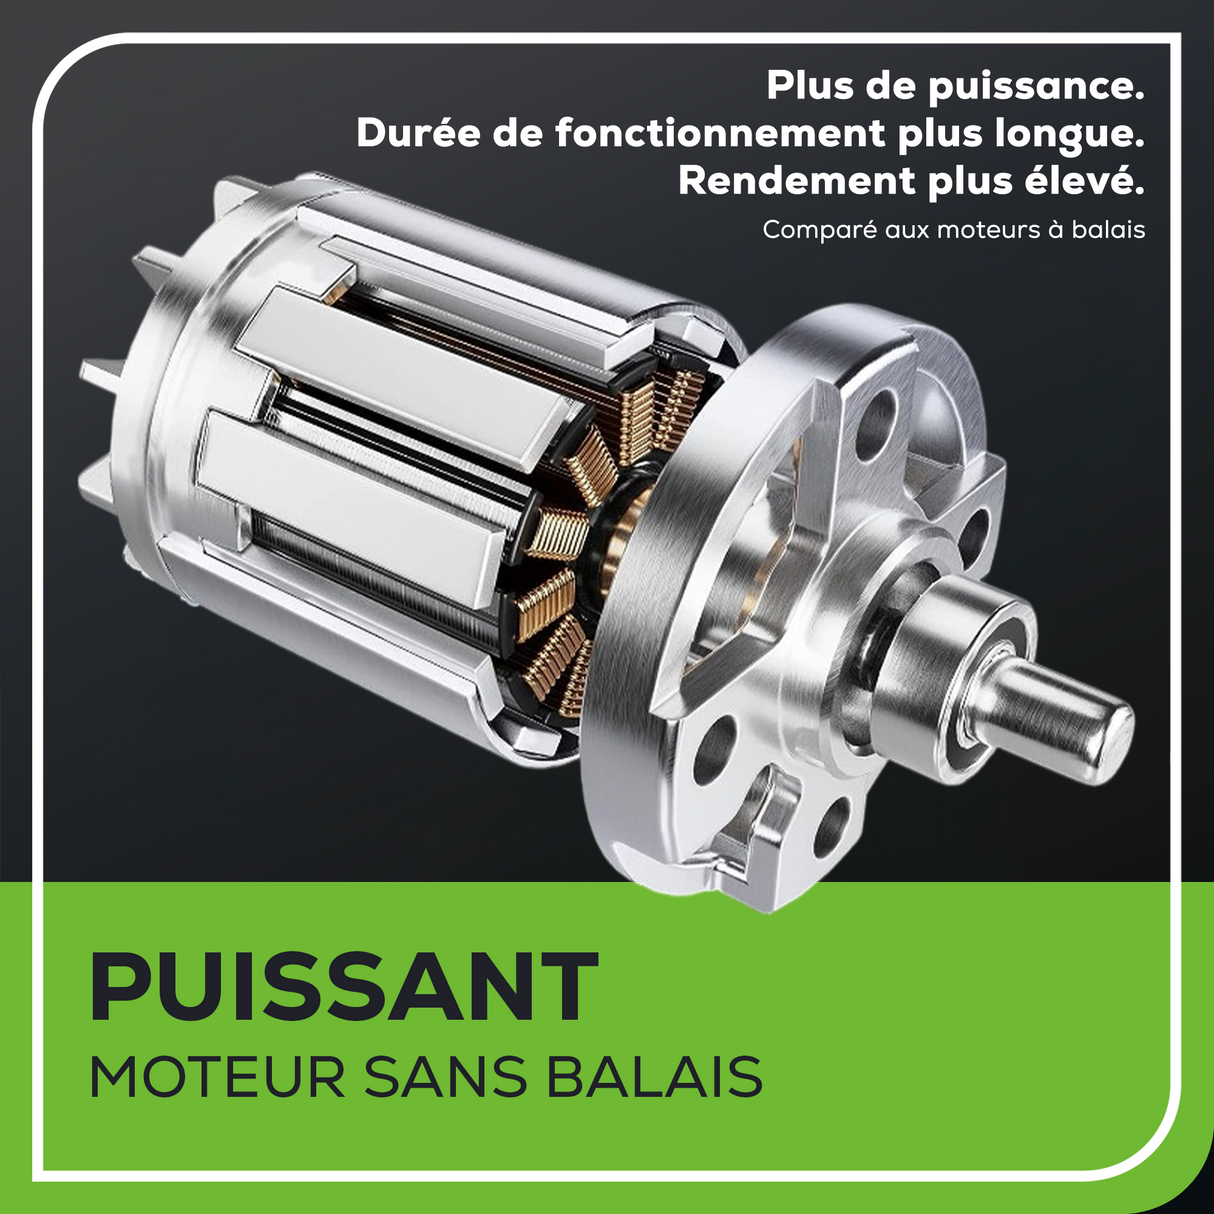
MoteurSans balais
-
Puissance nominale du moteur1,0 kW
-
Frein de chaîne actif ?Non
-
Longueur du guide-chaîne/chaîne10 po.
-
Taille de la chaînePas de 1/4 po à profil bas, Calibre .050 po, 58 maillons d'entraînement
-
Taille du fichier d'affûtage de chaîne5/32 po.
-
Système de tension ?Avec outil
-
Vitesse de la lame13 mètres par seconde
-
Graisseur de chaîneAutomatique
-
Type d'huileHuile standard pour guide-chaîne et chaîne
-
Capacité du réservoir d'huile80 ml
-
Temps d'assemblage estimé≈ 5 minutes
-
Garantie4 ans de garantie
-
Chargeur 60 V
-
Voltage60 V
-
Poids2,07 livres
-
Taille5,3 po. × 7,3 po. × 6,5 po.
-
Temps de charge à 100 %À partir de 60 minutes
-
Indicateur DEL de diagnosticOui
-
Temps de charge (batterie 2,0 Ah)60 minutes
-
Temps de charge (batterie 2,5 Ah)75 minutes
-
Temps de charge (batterie 5,0 Ah)150 minutes
-
Garantie4 ans de garantie
-
Batterie lithium-ion 60 V 2,0 Ah
-
Voltage60 V
-
Ampères-heures2,0 Ah
-
Poids3,08 livres
-
Taille3,5 po. × 5,7 po. × 7,7 po.
-
Wattheures120
-
Temps de charge à 100 %À partir de 60 minutes
-
Indicateur DEL de diagnosticOui
-
Garantie4 ans de garantie
Manuels
Manuels
-
Télécharger :
-
Télécharger :
Comprend
Comprend
- Taille-haie 60 V avec accessoire pour scie à perche
- 2910402CT - Chargeur 60 V
- 2906402CT - Batterie lithium-ion 60 V 2,0 Ah
- Bretelles
- Le manuel du propriétaire
Vidéos de produits
Foire aux questions
Foire aux questions
- Qu'est-ce qu'une scie à perche ?
- Comment dois-je tenir ma scie à perche ?
- Quelles précautions de sécurité faut-il prendre ?
- Quelle épaisseur de branche puis-je couper ?
- La scie à perche peut-elle être utilisée pour les haies ?
- Pouvez-vous retirer les poteaux et l'utiliser comme une scie régulière ?
- Puis-je utiliser ma scie à perche pour couper des objets plus près du sol ?
- Des lames de rechange sont-elles disponibles ?
- Peut-on fixer un poteau pour en faire un taille-haie à perche ?
- Que faire si la lame est bloquée (le moteur bourdonne, les lames ne bougent pas) ?
- Pourquoi les lames ne coupent-elles pas bien ?
- Existe-t-il un bouton automatique pour ne pas avoir à maintenir continuellement la gâchette enfoncée ?
- Quelle huile dois-je utiliser pour lubrifier les lames ?
- Quelle est la durée d'exécution ?
- Quel taille-haie me convient le mieux ?
- Quelle est la capacité de coupe ?
- Pourquoi mon taille-haie ne s'allume pas ?
- Dois-je mettre de l’huile de temps en temps ?
- Le taille-haie est-il doté d'un verrouillage de sécurité si je le laisse tomber accidentellement ?
- Qu'est-ce qu'un taille-haie à perche ?
- Puis-je ajouter des perches supplémentaires à mon taille-haie à perche ?
- Les poteaux peuvent-ils être retirés pour les convertir en taille-haie portatif ?
- Comment dois-je tenir un taille-haie à perche ?
- Puis-je tailler les couvre-sols avec un taille-haie à perche ?
- Puis-je laisser ma batterie dans le chargeur après l'avoir chargée ?
- Pourquoi les batteries coûtent-elles beaucoup plus cher que l’outil ?
- Comment dois-je entreposer la batterie ? Puis-je laisser la batterie dans le garage ou dans la cabane ?
- Ma batterie est coincée dans mon outil. Comment la retirer ?
- Comment vérifier la charge de ma batterie ?
- Puis-je utiliser n’importe quelle batterie Greenworks dans n’importe quel outil Greenworks ?
- Existe-t-il certains outils qui ne peuvent pas accepter toutes les batteries de même voltage ?
- Est-ce que toutes les batteries de même voltage utilisent le même chargeur ?
- La température de la batterie est-elle importante ?
Les scies à perche sont des scies à chaîne allongées dont les commandes et la tête du moteur sont séparées par une longue perche. Elles ont tendance à avoir des guide-chaînes et des chaînes plus courtes que les scies à perche de taille normale et sont principalement utilisées pour l'élagage et l'élagage léger. Les utilisateurs doivent prendre des précautions de sécurité de base et courantes et suivre la procédure d'utilisation appropriée lors de l'utilisation des unités pour éviter les blessures.
Pour un meilleur équilibre lors de l'utilisation d'une scie à perche, ne vous penchez pas trop en avant. Gardez toujours une bonne position et un bon équilibre. En vous entraînant à maintenir une bonne position et un bon équilibre, vous aurez le contrôle de l'outil dans des situations inattendues. Tenez toujours fermement l'appareil à deux mains ; gardez votre main gauche sur l'arbre de scie et votre main droite sur la poignée arrière, de sorte que votre corps soit à gauche de la ligne de chaîne. N'utilisez jamais une prise de la main gauche (mains croisées) ou toute position qui place votre corps ou votre bras en travers de la ligne de chaîne. Assurez-vous de maintenir une bonne prise sur l'appareil lorsque le moteur tourne. Pour plus de détails, reportez-vous au manuel d'instructions.
Utilisez les scies à perche uniquement pour l'usage auquel elles sont destinées. Les scies à perche sont idéales pour tailler et élaguer les branches difficiles à atteindre. Pensez à l'endroit où la branche à couper peut tomber. Comme cela est parfois imprévisible, ne vous placez pas sous la branche à couper. Essayez de garder l'arbre entre vous et la branche à tailler (comme une sorte de bouclier contre les débris qui tombent). Gardez les spectateurs à au moins 15 mètres de l'arbre sur lequel vous travaillez. Prenez toujours votre temps. Lorsque vous retirez des branches longues et lourdes, coupez-les par étapes, en coupant de petites sections pour réduire l'impact des débris qui tombent. Commencez par les branches les plus basses pour que les débris puissent tomber plus facilement et ne restent pas coincés, ce qui pourrait entraîner un danger futur.
Les scies à perche sont généralement utilisées sur des branches de moins de 6 pouces de diamètre.
La scie à perche serait capable de tailler des haies ; cependant, un taille-haie à perche serait plus approprié pour le travail et laisserait un aspect plus propre.
Non. Cet appareil ne peut pas être converti en scie à chaîne régulière. Cependant, certains modèles vous permettent de retirer la rallonge centrale pour raccourcir l'appareil de quelques pieds.
La scie à perche est conçue pour les branches hautes et difficiles à atteindre. Elle n'est pas ergonomiquement adaptée à la coupe basse et une extrême prudence est de mise.
La lame fait partie du bloc moteur et ne peut pas être facilement remplacée par le client. Il convient plutôt de l'affûter. Nous déconseillons au client d'affûter lui-même la lame de nos taille-haies, à moins qu'il ne soit familiarisé avec cette tâche. Dans la plupart des cas, il est nécessaire d'apporter l'appareil à un technicien qualifié pour l'affûtage.
Malheureusement, ce n’est pas une option pour nos taille-haies portatifs désignés.
Option A – L’appareil est doté d’une fonction anti-bourrage : Si la branche est bloquée dans la lame, appuyez sur le bouton anti-bourrage du panneau de commande, la lame s’inversera deux fois et la branche devrait être libérée. Vous pouvez nettoyer les lames en retirant toute autre saleté et débris à l’aide d’un pinceau, puis en appliquant une huile légère pour machine. Il est recommandé d’utiliser du WD-40 ou un produit similaire. Assurez-vous de débrancher la source d’alimentation avant de nettoyer. Option B – Le modèle n’a pas de fonction anti-bourrage : Pour rectifier un bourrage, commencez par retirer la batterie ou débranchez l'appareil. Éliminez les débris, puis vous pouvez nettoyer les lames en retirant toute saleté et débris à l’aide d’un pinceau, puis en appliquant une huile légère pour machine. Il est recommandé d’utiliser du WD-40 ou un produit similaire.
En général, cela est dû à de la sève ou à des débris coincés entre les lames (voir la question « Que faire si la lame est bloquée ») ou la lame peut avoir besoin d'être affûtée.
Par mesure de sécurité, aucun de nos taille-haies n'est équipé d'un bouton de démarrage automatique qui permettrait au client de faire fonctionner l'appareil sans maintenir la gâchette.
Les clients peuvent utiliser une huile de machine légère pour lubrifier les lames.
L'autonomie varie en fonction de la batterie utilisée et fluctue en fonction de la charge et de la technique de l'utilisateur. Cependant, les taille-haies équipés d'une batterie de 2,0 Ah peuvent fournir jusqu'à 50 minutes d'autonomie sous une charge légère.
Comme beaucoup de nos outils, les taille-haies sont fabriqués dans une large gamme de tailles et de puissances. Notre modèle léger de 2,7 A est extrêmement facile à manipuler et très utile pour les personnes qui n'ont pas vraiment besoin de tailler leurs haies, le taille-haie à perche G-MAX est idéal pour les utilisateurs avec des haies hautes et difficiles à atteindre et les modèles 60 V et 80 V sont parfaits pour la taille de haies intensive et de longue durée. Les utilisateurs professionnels doivent se référer à notre gamme 82 V.
Selon le modèle, la capacité de coupe varie entre 5/8po. ou 1,2po. Reportez-vous au manuel d'instructions pour plus de détails
Fonctionnement sur batterie : la plupart du temps, cela signifie que la batterie n'a pas été complètement insérée. Sur le chargeur comme sur l'appareil, vous saurez que la batterie est correctement fixée lorsque vous entendrez un clic. Vous pourrez également déterminer si la batterie est complètement insérée car vous ne pourrez pas retirer la batterie sans appuyer sur le bouton situé sur la batterie. Si la poignée tourne, assurez-vous qu'elle est verrouillée en position, sinon l'appareil ne démarrera pas. Avec fil : Assurez-vous que la rallonge appropriée est utilisée, comme indiqué dans la section « Électricité » du manuel, et que le cordon ne s'est pas desserré au niveau de la prise ou du raccordement sur la tondeuse. Si la poignée tourne, assurez-vous qu'elle est verrouillée en position, sinon l'appareil ne démarrera pas.
Non, nos taille-haies sont sans huile et ne nécessitent aucune lubrification. Cependant, vous pouvez appliquer de temps en temps de l'huile légère pour machine sur la lame pour aider à lubrifier et à maintenir le tranchant de la lame
Si le taille-haie tombe accidentellement, il s'éteint et la lame s'arrête au bout de quelques secondes. Le taille-haie se verrouille alors à nouveau en position d'arrêt.
Les taille-haies à perche sont des taille-haies classiques fixés sur un poteau. Ils sont utilisés pour tailler des haies hautes sans utiliser d'échelle.
Non. Nous vous déconseillons d'ajouter des extensions supplémentaires.
Nous n'avons pas de modèle qui vous permette de passer d'un taille-haie à perche à un taille-haie portatif. Cependant, certains modèles vous permettent de retirer la rallonge centrale pour raccourcir l'appareil de quelques pieds.
Pour un meilleur équilibre lors de l'utilisation d'un taille-haie à perche, ne vous penchez pas trop en avant. Gardez toujours une bonne position et un bon équilibre. En vous entraînant à maintenir une bonne position et un bon équilibre, vous aurez le contrôle de l'outil dans des situations inattendues. Tenez toujours fermement l'appareil à deux mains ; gardez votre main gauche sur l'arbre de la perche et votre main droite sur la poignée arrière, de sorte que votre corps soit à gauche de la ligne de coupe. N'utilisez jamais une prise de la main gauche (mains croisées) ou toute position qui place votre corps ou votre bras en travers de la ligne de coupe. Assurez-vous de maintenir une bonne prise sur l'appareil lorsque le moteur tourne. Pour plus de détails, reportez-vous au manuel du propriétaire.
Le taille-haie à perche est idéal pour les branches hautes et difficiles à atteindre. Il n'est pas recommandé de l'utiliser pour couvrir le sol car il n'est pas ergonomiquement adapté à la coupe basse.
Les chargeurs de batterie sont dotés d'un dispositif d'arrêt automatique pour éviter toute surcharge. Cependant, nous conseillons aux clients de retirer la batterie du chargeur une fois qu'elle est complètement chargée et de débrancher également le chargeur de la prise, car il s'agit d'une bonne pratique de sécurité électrique. Cela permettra également d'éviter les fausses lectures de défauts et permettra au chargeur de se réinitialiser à chaque fois qu'il est utilisé pour charger une batterie.
La batterie est le composant le plus important d'un appareil à batterie. Soyez assuré que nous fixons le prix de nos batteries en tenant compte du coût des matériaux, de la fabrication et des prix actuels du marché. Les batteries sont les éléments les plus coûteux à fabriquer et à expédier dans n'importe quel ensemble. Les ensembles complets comprenant un outil, une batterie et un chargeur sont proposés à un prix abordable afin que les consommateurs puissent commencer à construire cette gamme d'outils et passer à l'achat d'appareils contenant uniquement des outils. Lorsque vous achetez des batteries seules, le coût qu'elles entraînent est plus important.
Lorsque la batterie n'est pas utilisée, nous vous suggérons de la entreposer à l'intérieur, dans un endroit frais et sec, à l'abri de la lumière directe du soleil. Laissez le chargeur débranché et la batterie déconnectée du chargeur, sauf si elle doit être rechargée. Il est recommandé d'entreposer la batterie complètement chargée et, si elle est entreposée pendant une période où aucune utilisation n'est prévue, de vérifier la charge tous les deux mois. Si vous remarquez que la charge a baissé, nous vous conseillons de recharger complètement la batterie avant de la remettre dans son lieu d'entreposage sûr. En suivant ces étapes, vous vous assurerez de tirer le meilleur parti de la durée de vie de la batterie.
Produits 60 V / 80 V : Pour retirer la batterie, appuyez sur le bouton de déverrouillage de la batterie et maintenez-le enfoncé. Ensuite, retirez la batterie en tirant dessus. Dans certains cas, si les ressorts situés en dessous se sont bloqués, vous devrez peut-être appuyer légèrement sur le haut de la batterie pour les réengager et aider la batterie à sortir. La batterie s'insère parfaitement dans le produit pour éviter tout délogement accidentel pendant l'utilisation ; il peut être nécessaire de tirer fort pour la retirer. Avant utilisation, assurez-vous que les rails de la batterie et du produit sont exempts de débris qui pourraient coincer la batterie. Produits 24 V/40 V : Pour retirer la batterie, appuyez sur le bouton de verrouillage de la batterie et maintenez-le enfoncé. Retirez la batterie de la poignée. La batterie s'insère parfaitement dans le produit pour éviter tout délogement accidentel pendant l'utilisation ; il peut être nécessaire de tirer fort pour la retirer. Avant utilisation, assurez-vous que les rails de la batterie et du produit sont exempts de débris qui pourraient coincer la batterie.
Appuyez sur le bouton indicateur de capacité de la batterie (BCI) situé à l'extrémité de la batterie. Les voyants s'allumeront en fonction du niveau de capacité de la batterie. Veuillez noter que cet interrupteur nécessite une pression directe et ferme du bout du doigt. Si le bouton n'est pas complètement enfoncé, les voyants ne s'allumeront pas. Veuillez également noter que les voyants ne restent allumés que quelques secondes et s'éteignent automatiquement. Une autre raison pour laquelle les voyants ne s'allument pas est que la batterie est complètement déchargée et doit être rechargée.
Nos batteries sont interchangeables uniquement avec des outils de la même plateforme de voltage. La différence entre les batteries de même voltage est la capacité en ampères-heures (Ah). Plus la capacité en ampères-heures (Ah) de la batterie est élevée, plus elle offre d'autonomie.
Il existe quelques exceptions. • Nos modèles de souffleuses à neige 80 V 20 po 2600402 / 2605202 / 2601302 fabriqués avant septembre 2017 ne peuvent utiliser que des modèles de batterie de 2,0 Ah ou 2,5 Ah. • Notre modèle de batterie 60 V 8,0 Ah 2957102 ne peut pas être utilisé dans les outils suivants en raison de la hauteur : tondeuses à double port, laveuses à pression ou aspirateur à déchets sec/humide.
Oui, c'est le cas. Chaque gamme de produits dispose de modèles de chargeurs spécifiques qui peuvent charger toutes les batteries de cette plateforme de voltage, quelle que soit leur capacité en Ah.
La température de la batterie avant utilisation ne doit pas être trop élevée ou trop basse. Pour les souffleuses à neige, si la batterie est trop froide, elle risque de ne pas fonctionner. Laissez la batterie atteindre la température ambiante avant utilisation. Pour nos autres outils, laissez la batterie refroidir avant utilisation si elle est trop élevée. Pour éviter les problèmes de température de la batterie, les batteries doivent être gardées à l'intérieur dans un endroit sec et frais. Les informations sur l'entreposage et la température de la batterie se trouvent dans votre manuel d'instructions.


